WooCommerce
Category: E-commerce. Connect WooCommerce and your widget can find products and check orders for visitors, right inside the chat.Integrations are available on the Pro and Business plans. WooCommerce shares the E-commerce category with Shopify, so only one of the two can be active at a time.
What This Bot Can Do
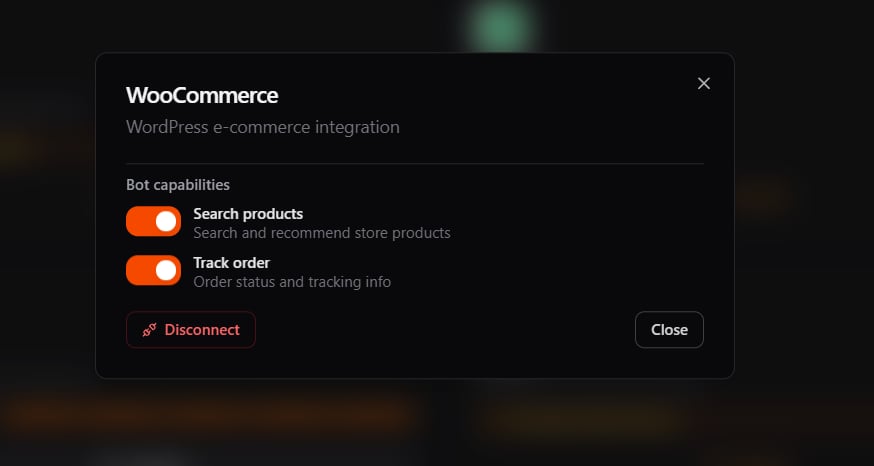
The bot does exactly these actions, nothing more. “Needs sign-in” means the visitor must be identified first; otherwise the bot gives a safe, neutral answer.| Action | What it does | Needs sign-in |
|---|---|---|
| Search products | Search your catalog by keyword and show products with price and image (up to 100). | No |
| Check order status | Look up an order’s status and details by the visitor’s email. | Yes |
What It Can’t Do
WooCommerce is scoped to the actions above. It does not:- Add items to a cart or check out from the chat (visitors do that on your store)
- Process returns or change an order from the chat
- Look up an order without the visitor’s email
Part 1 — Connect WooCommerce
BestChatBot reads your store through the WooCommerce REST API. You generate a read-only API key in WordPress, then paste it into BestChatBot.Step 1 — Generate a WooCommerce REST API key
In WordPress, go to WooCommerce → Settings → Advanced → REST API and click Add key.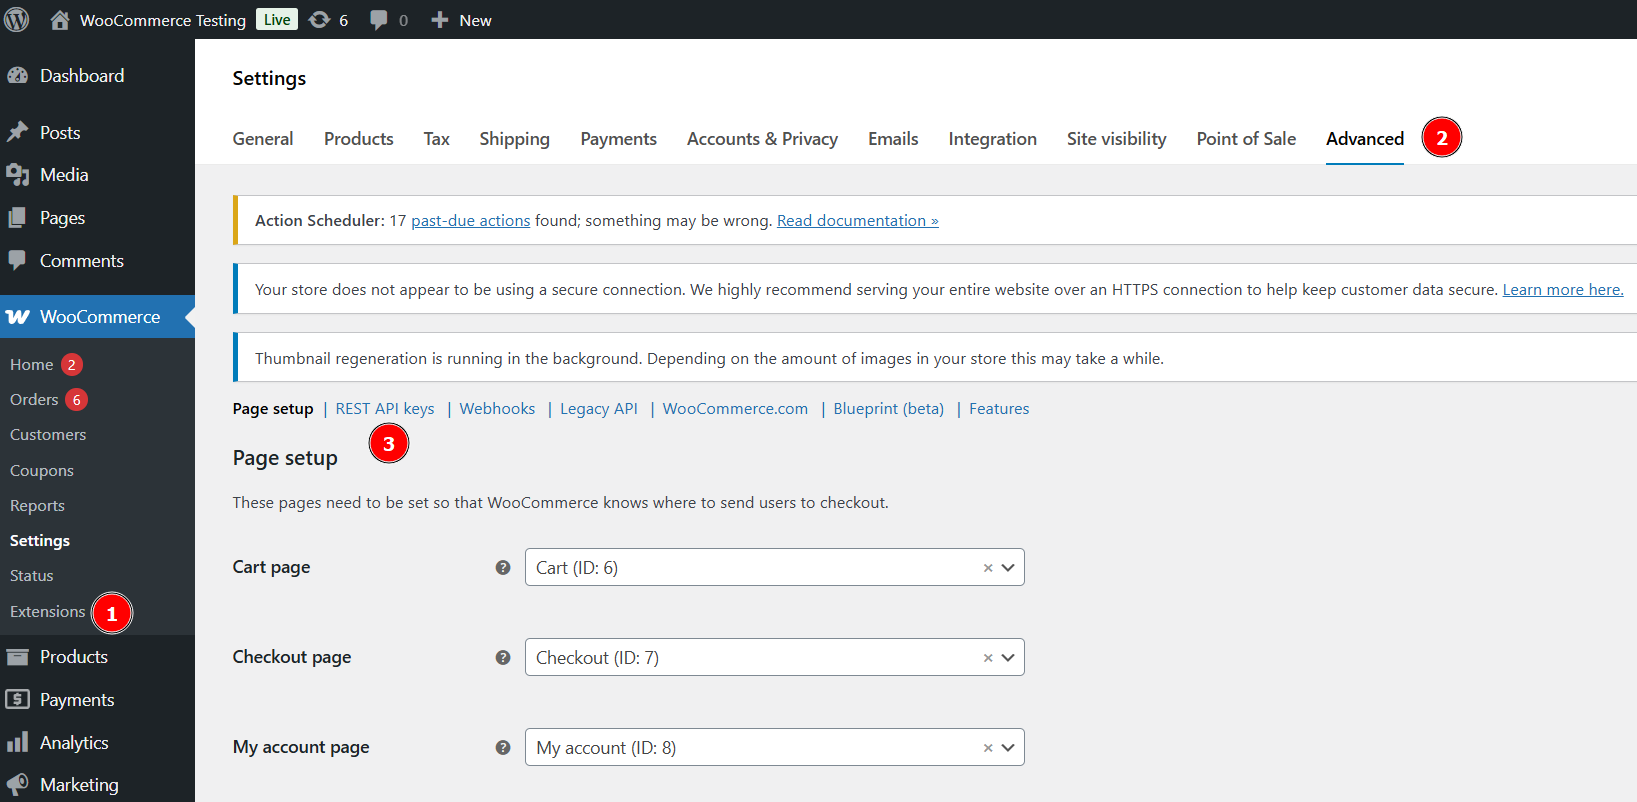
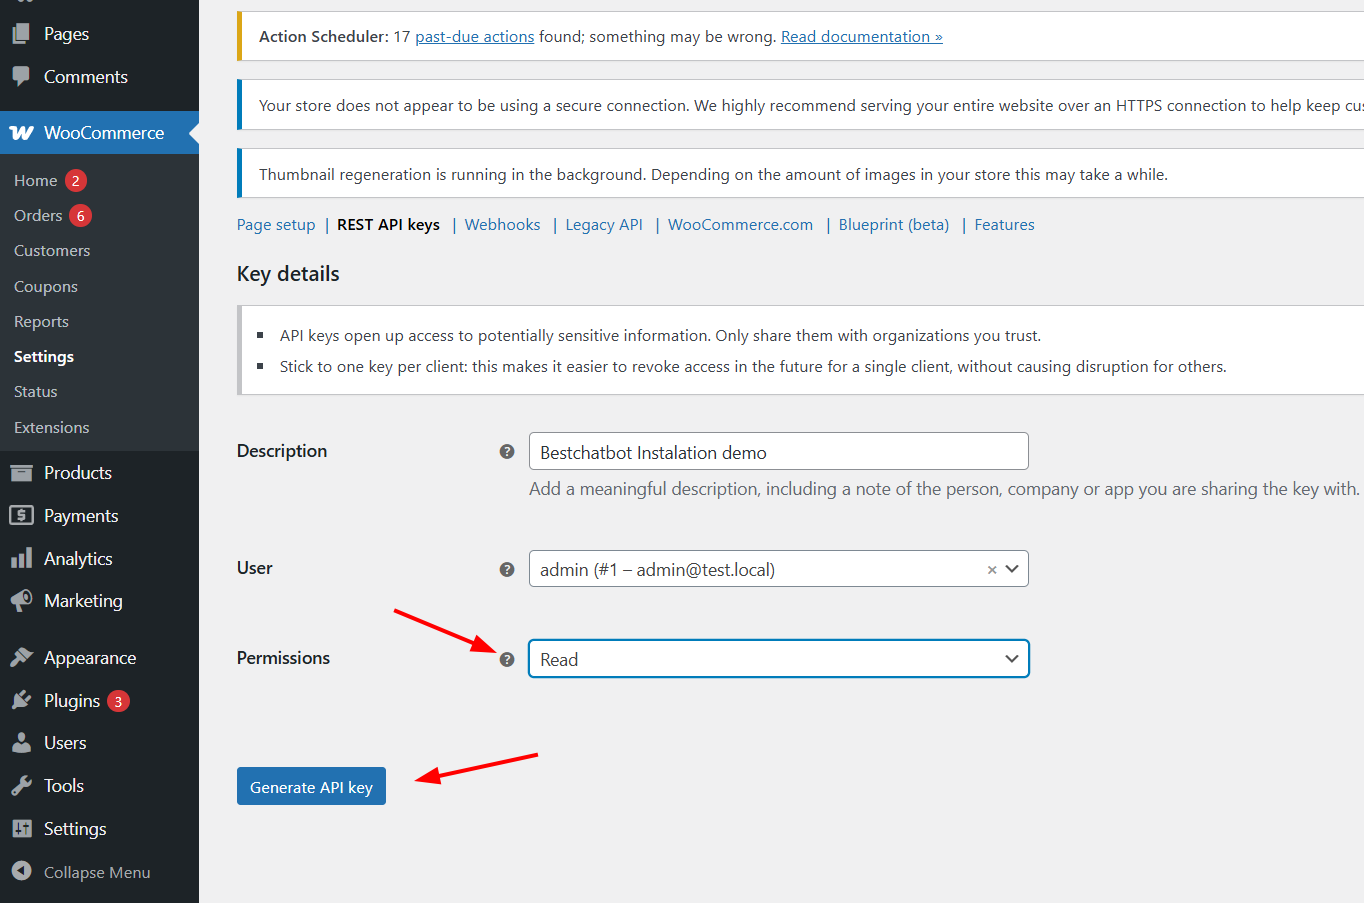
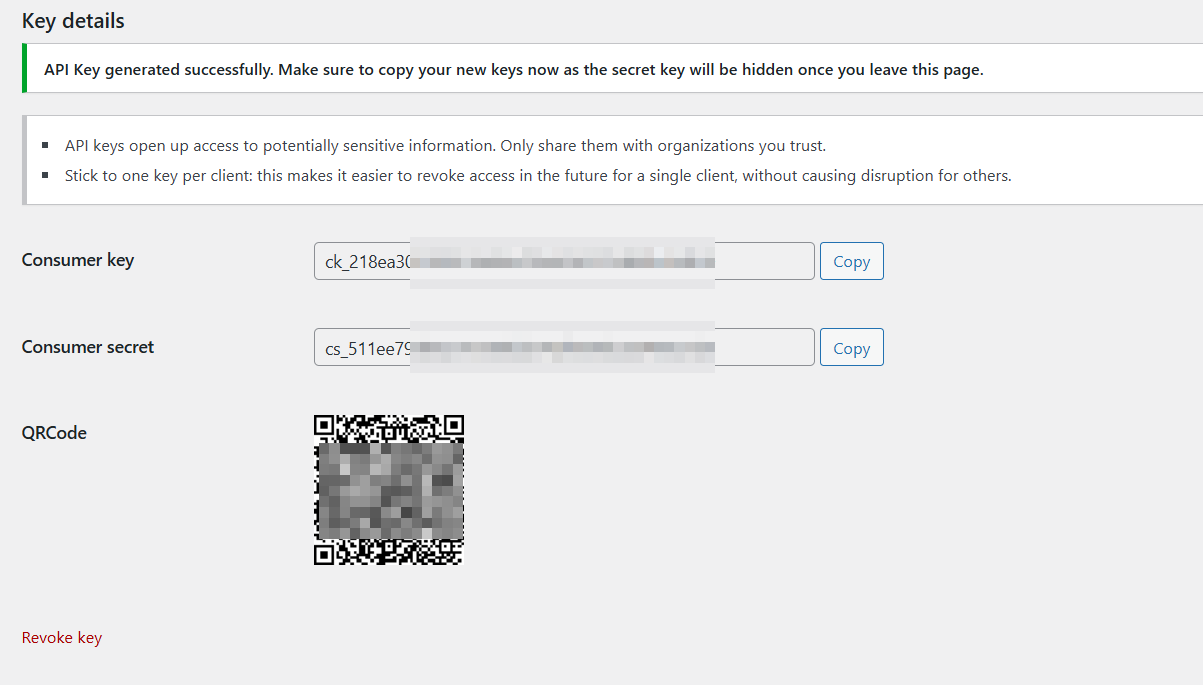
ck_...) and Consumer secret (cs_...). Copy both now — the secret is only shown once.
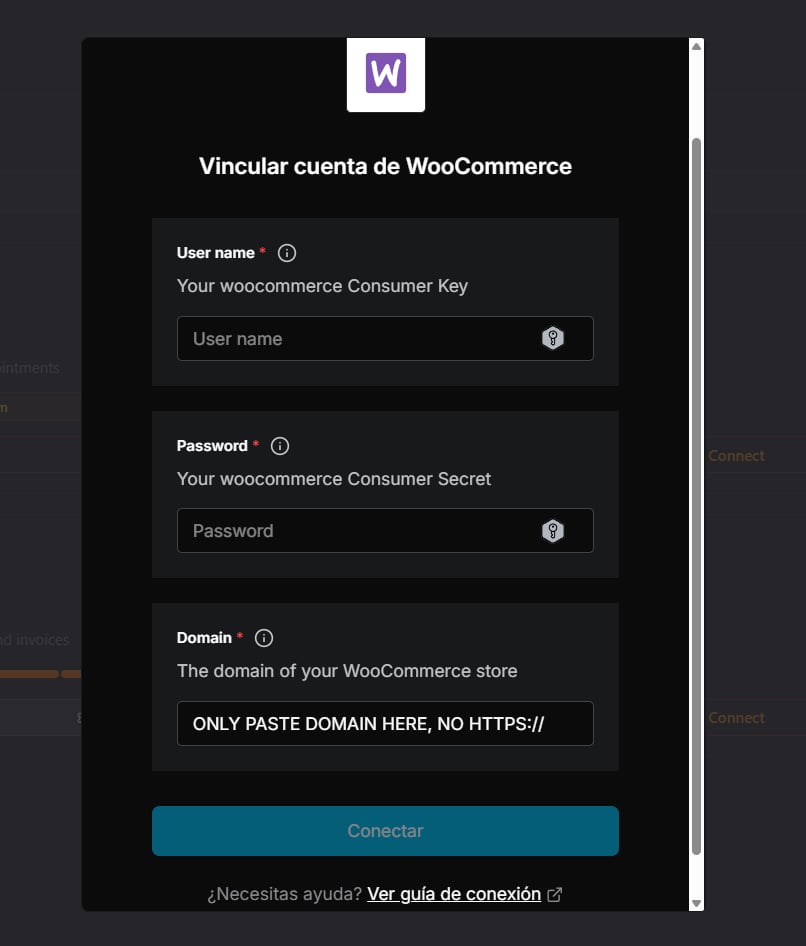
Step 2 — Connect in BestChatBot
In your workspace dashboard, open the Integrations tab, find WooCommerce, and click Connect. In the popup:- User name → your Consumer key (
ck_...) - Password → your Consumer secret (
cs_...) - Domain → your store’s domain without
https://(e.g.,my-store.com)
Connecting integrations requires an Editor, Admin, or Owner role. See Members & Roles.
Step 3 — You’re connected
You’ll see a success confirmation, and WooCommerce’s actions become available right away. If Shopify was connected, it’s disconnected automatically.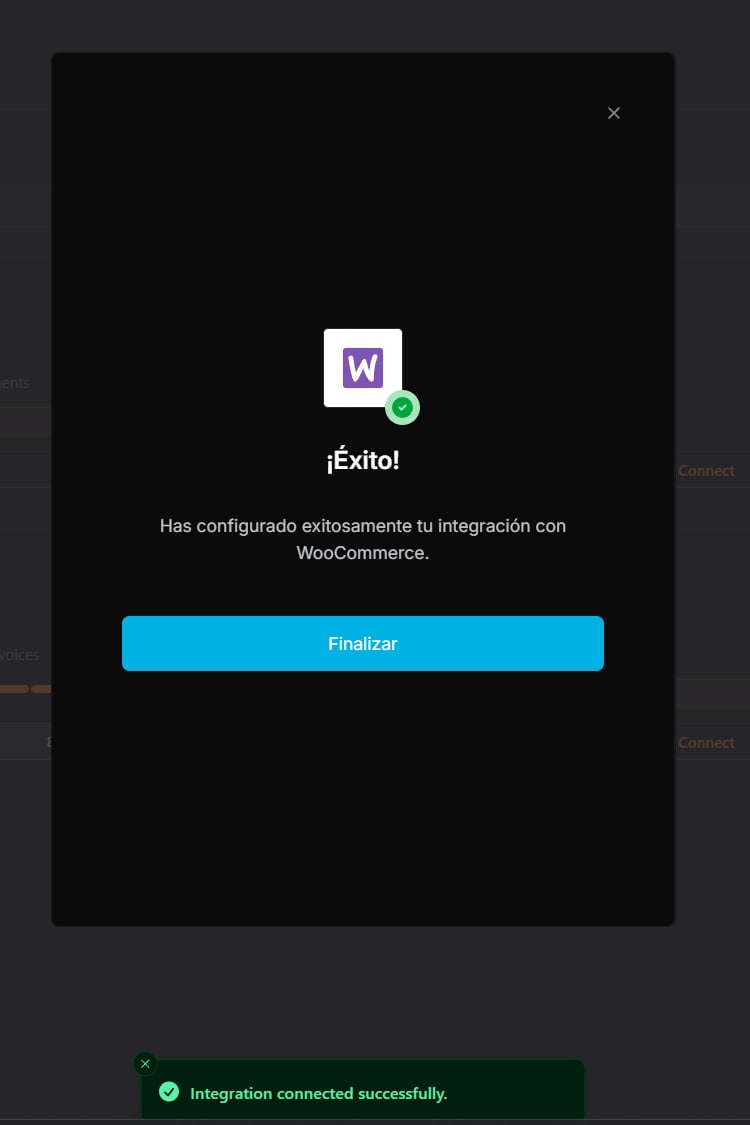
Part 2 — Install the Widget on WordPress
Connecting WooCommerce lets the bot read your store. To show the widget on your site and let logged-in customers check their own orders without typing their email, install the official Chatbot IO Widget WordPress plugin. It embeds the widget and signs a short identity token for the logged-in customer, so order lookups are identity-aware out of the box.Step 1 — Install the plugin
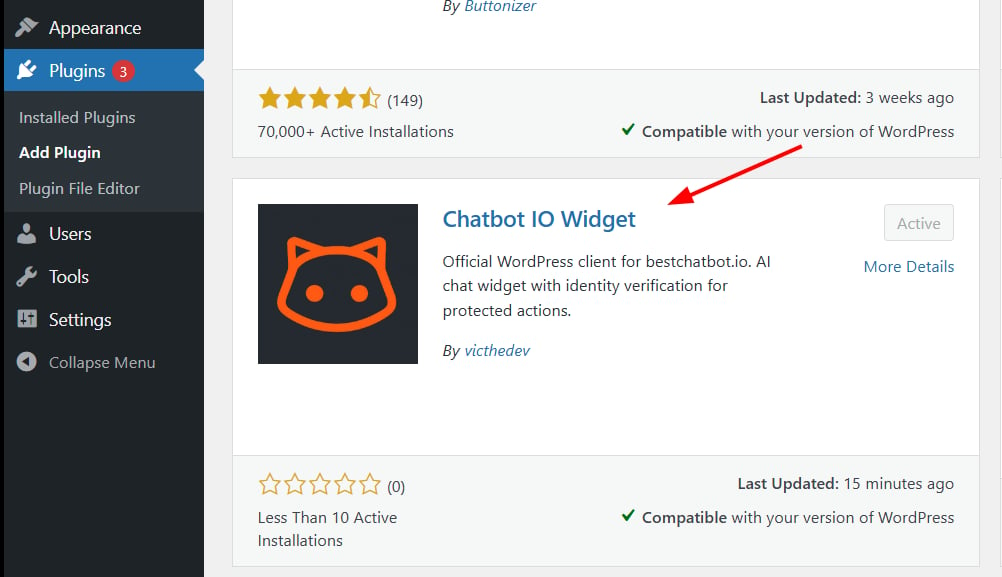
In WordPress, go to Plugins → Add Plugin and search for Chatbot IO Widget (by victhedev). Install and activate it.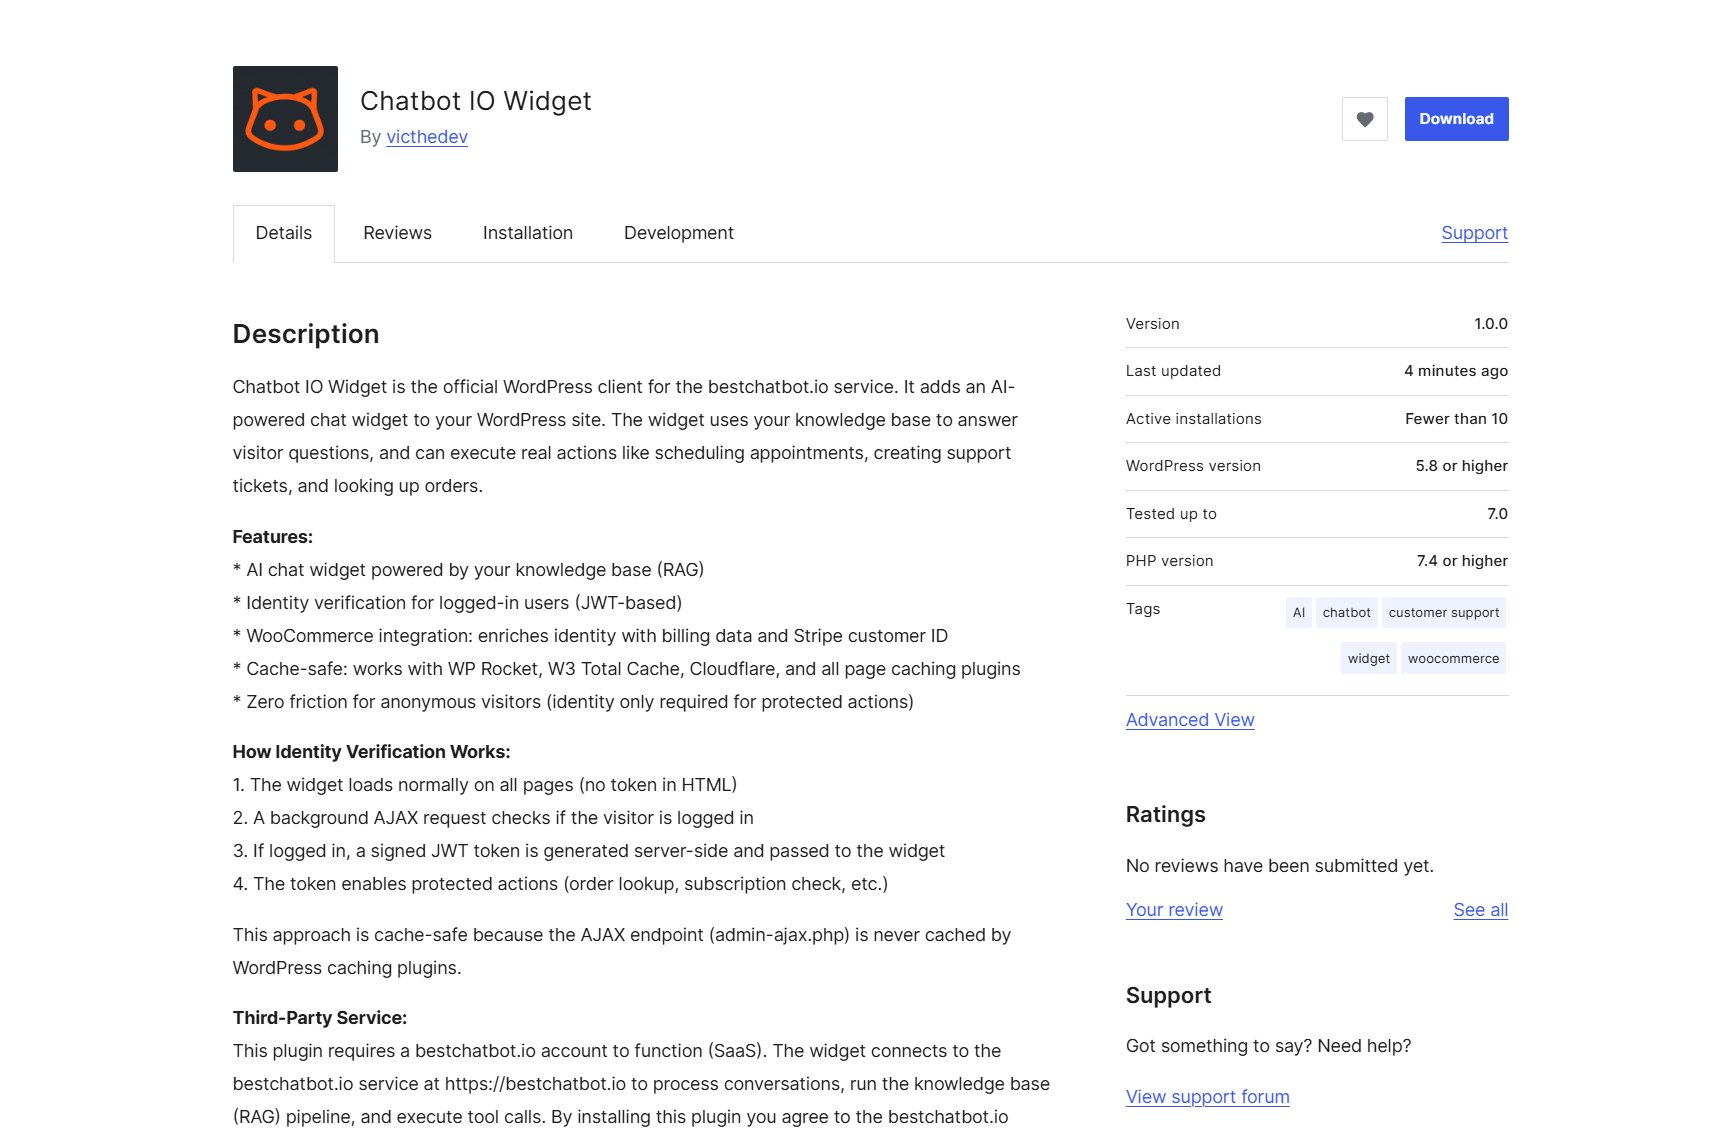
Step 2 — Create a signing key in BestChatBot
In your dashboard, open your Web Widget → Security tab and click Create Signing Key. This key lets your site sign identity tokens that the widget trusts. Keep it secret.
For the full identity flow and token format, see Visitor Identity.
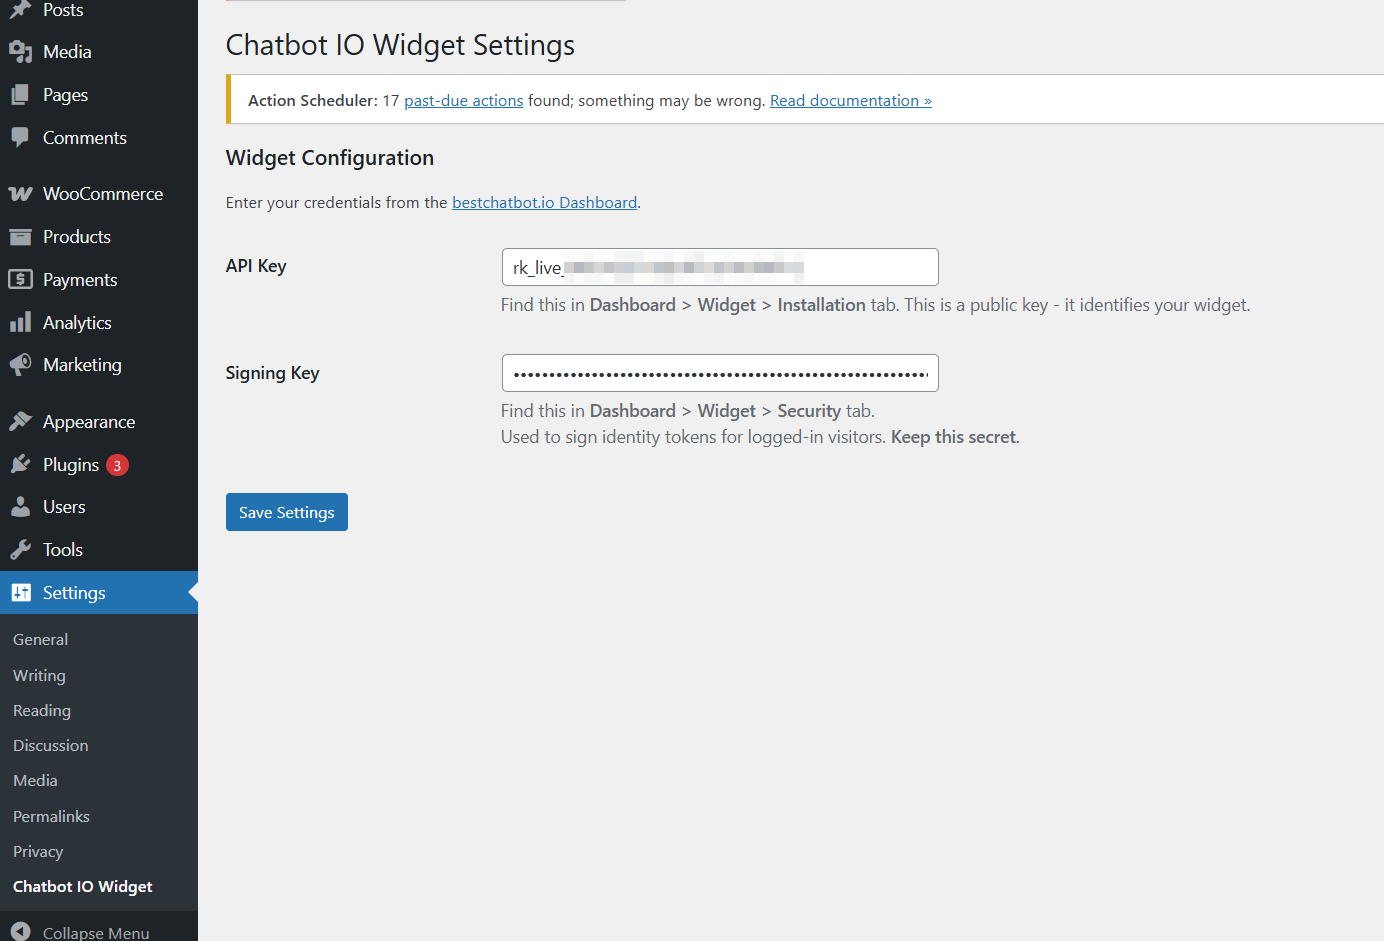
Step 3 — Configure the plugin
Open Settings → Chatbot IO Widget in WordPress and enter:- API Key — your widget’s public key (
rk_live_...), found in Dashboard → Web Widget → Installation. - Signing Key — the secret key from Dashboard → Web Widget → Security (Step 2). Keep it secret.
Done — identity-aware order lookups
The widget now appears on your store, and logged-in customers can ask things like “track my order” and get their orders back instantly, with no email prompt.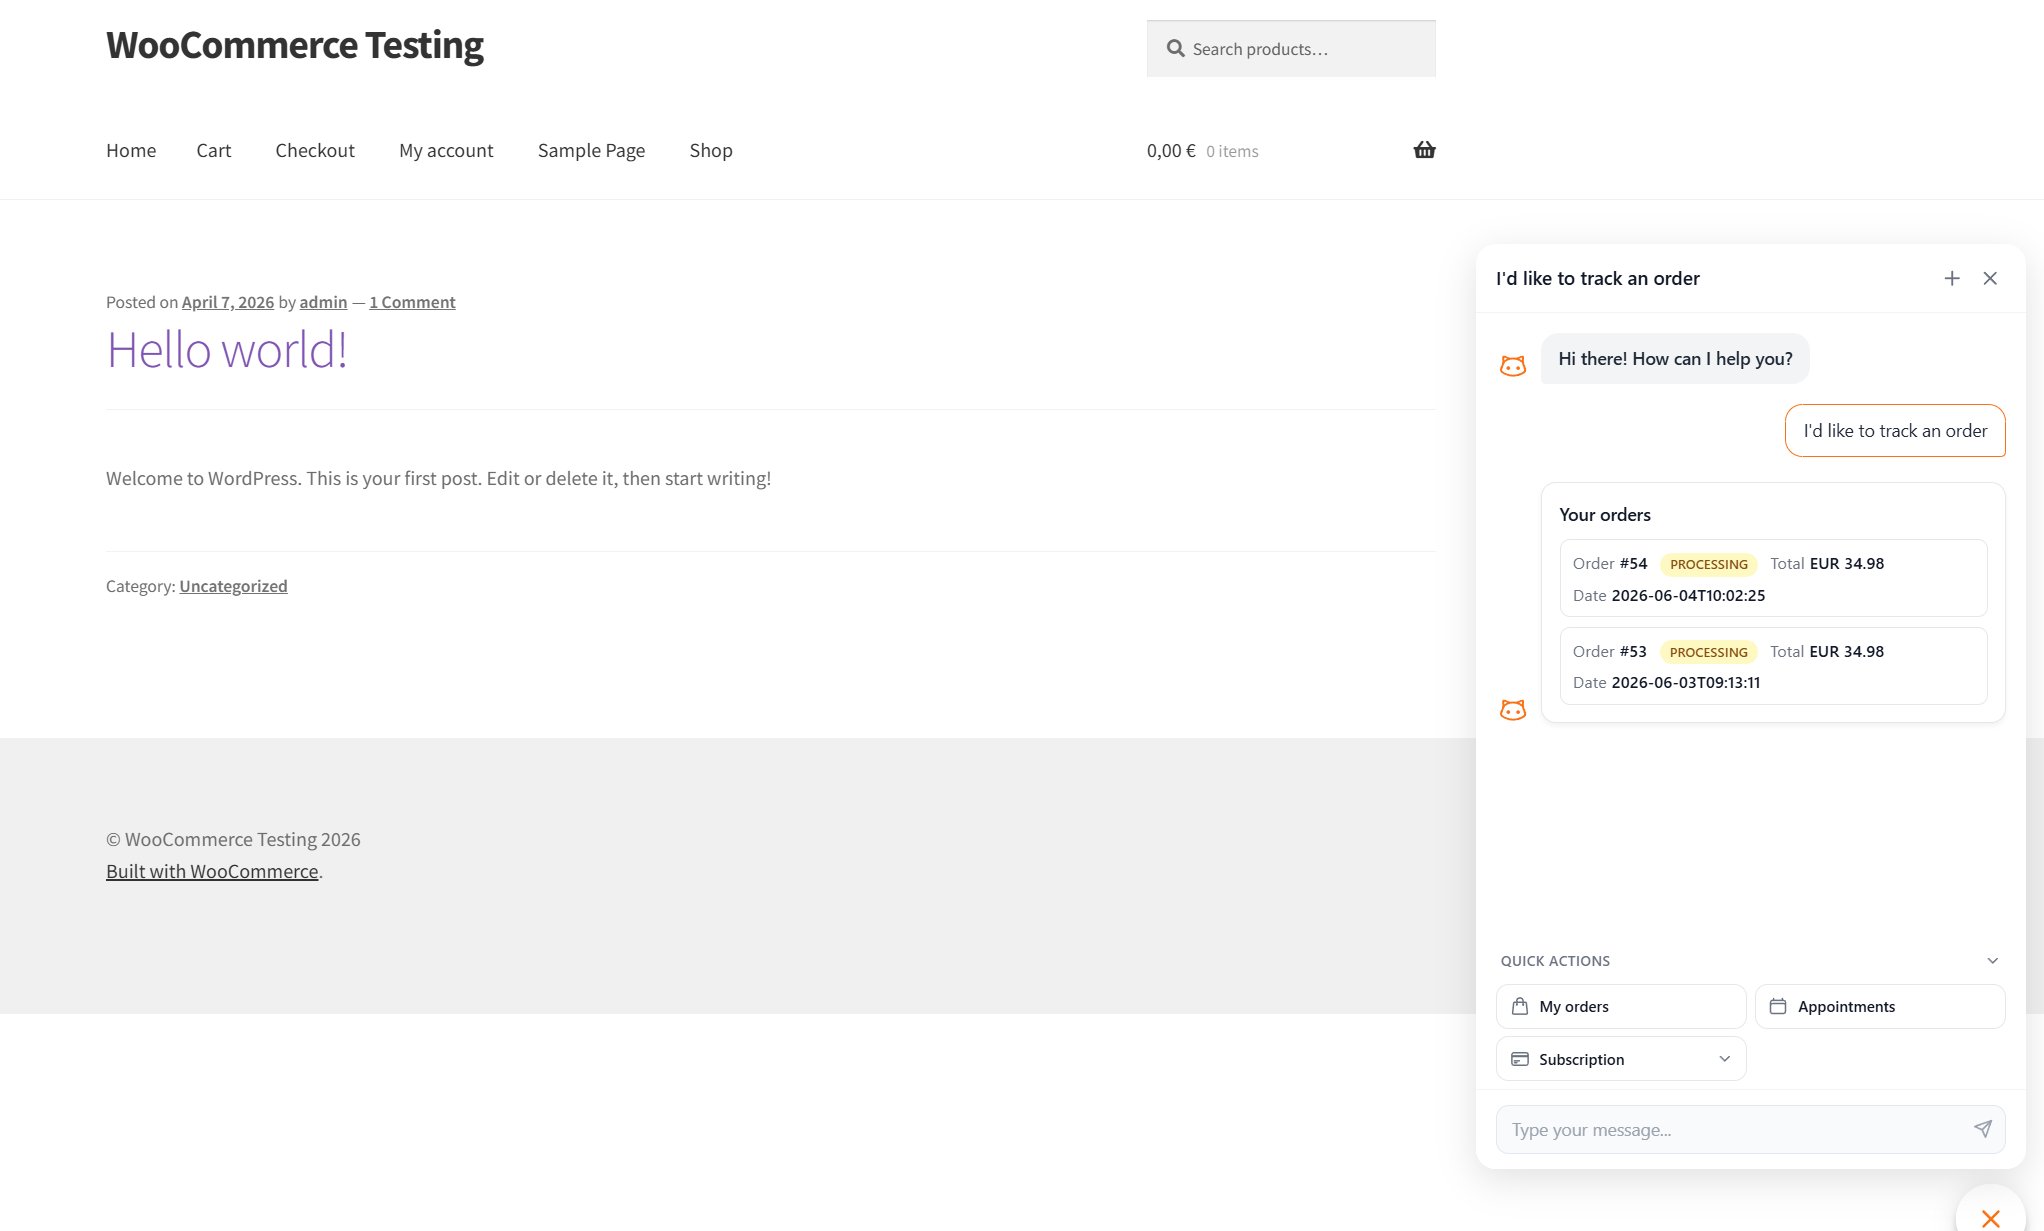
One per Category
WooCommerce is in the E-commerce category with Shopify. Connecting one disconnects the other, so your bot always has a single, clear tool for e-commerce.Availability
| Plan | WooCommerce |
|---|---|
| Free | — |
| Starter | — |
| Pro | ✅ |
| Business | ✅ |
Next Steps
Visitor Identity
Set up identity verification for personal actions like order lookups.
Agentic Actions
Learn how the bot turns a request into a real action.