Stripe
Category: Payments. Connect Stripe and your widget can answer billing questions and start purchases for visitors, right inside the chat.Integrations are available on the Pro and Business plans.
What This Bot Can Do
The bot does exactly these actions, nothing more. “Needs sign-in” means the visitor must be identified first; otherwise the bot gives a safe, neutral answer.| Action | What it does | Needs sign-in |
|---|---|---|
| Check a subscription | Show the visitor their current plan and next billing date. | Yes |
| Check invoice history | List the visitor’s recent invoices with amounts, dates, and payment status. | Yes |
| Check payment methods | Show saved payment methods (card brand and last 4 digits only). | Yes |
| Open the billing portal | Give the visitor a secure portal link to cancel, upgrade, or update payment themselves. | Yes |
| Start a purchase | Generate a checkout link so the visitor can buy a plan or product. | No |
What It Can’t Do
Stripe is scoped to the actions above. It does not:- Cancel or change a subscription directly (it hands the visitor a secure portal link instead)
- Issue refunds or charge a card
- Create or edit products and prices
- Show full card numbers (only the brand and last 4 digits)
How to Connect
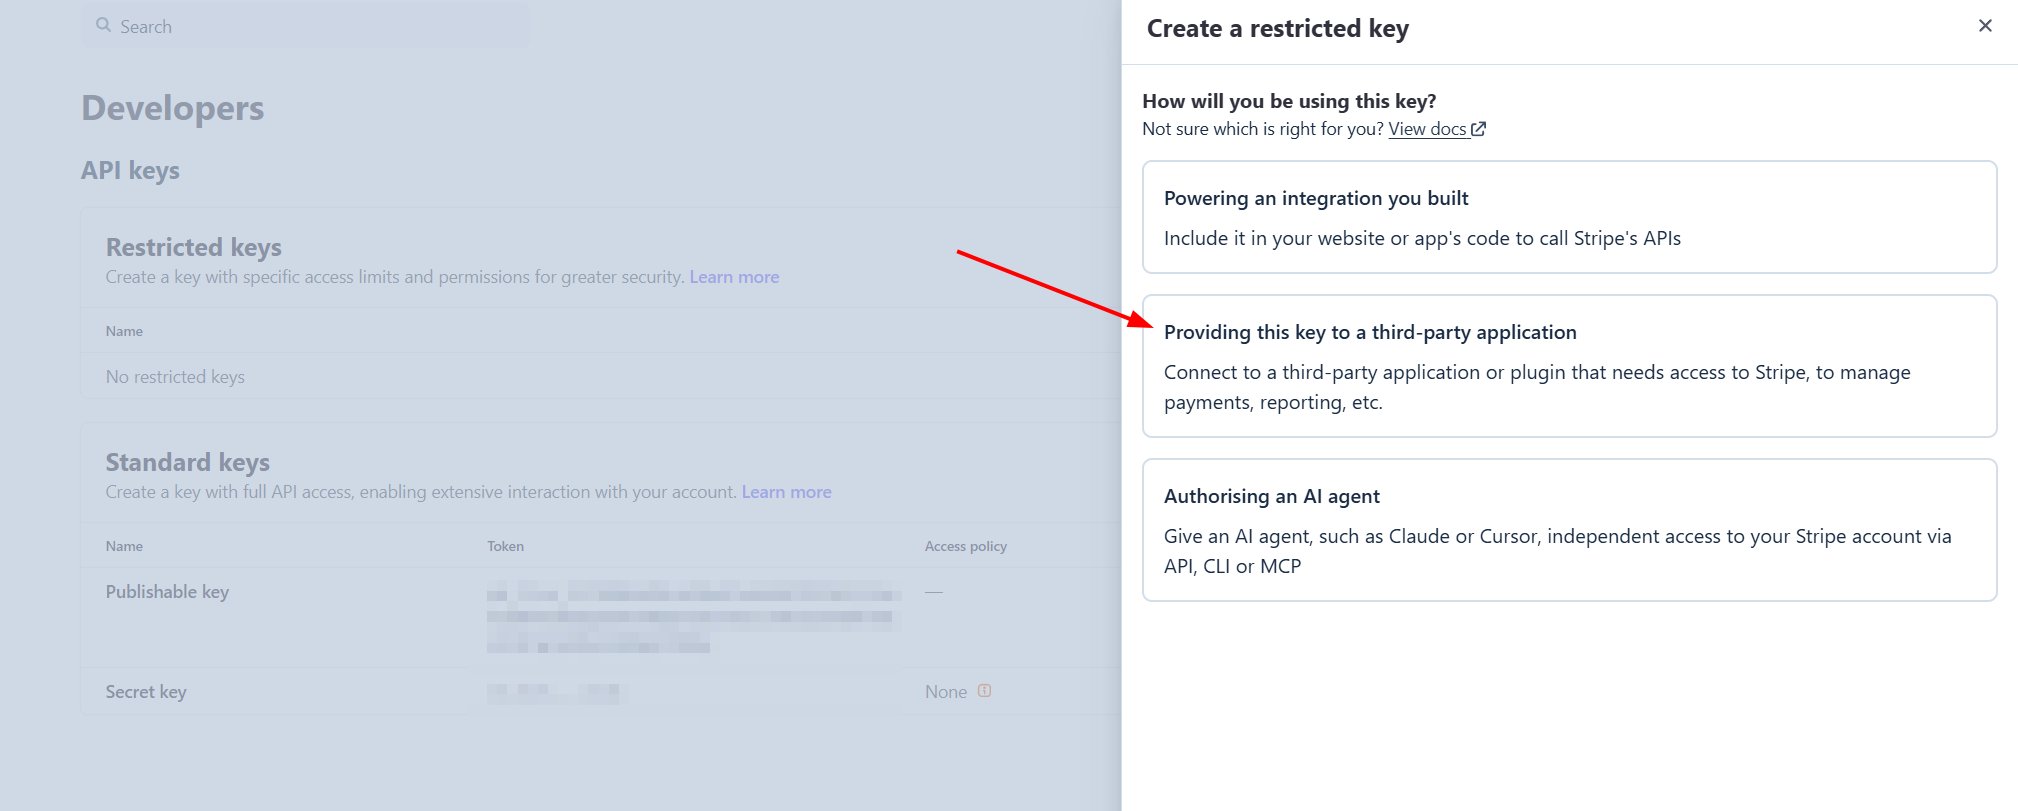
BestChatBot connects to Stripe with a restricted API key — a key scoped to only the permissions the bot needs. You create the key in your Stripe Dashboard, then paste it into BestChatBot.Step 1 — Create a restricted key in Stripe
In your Stripe Dashboard, go to Developers → API keys and click Create restricted key.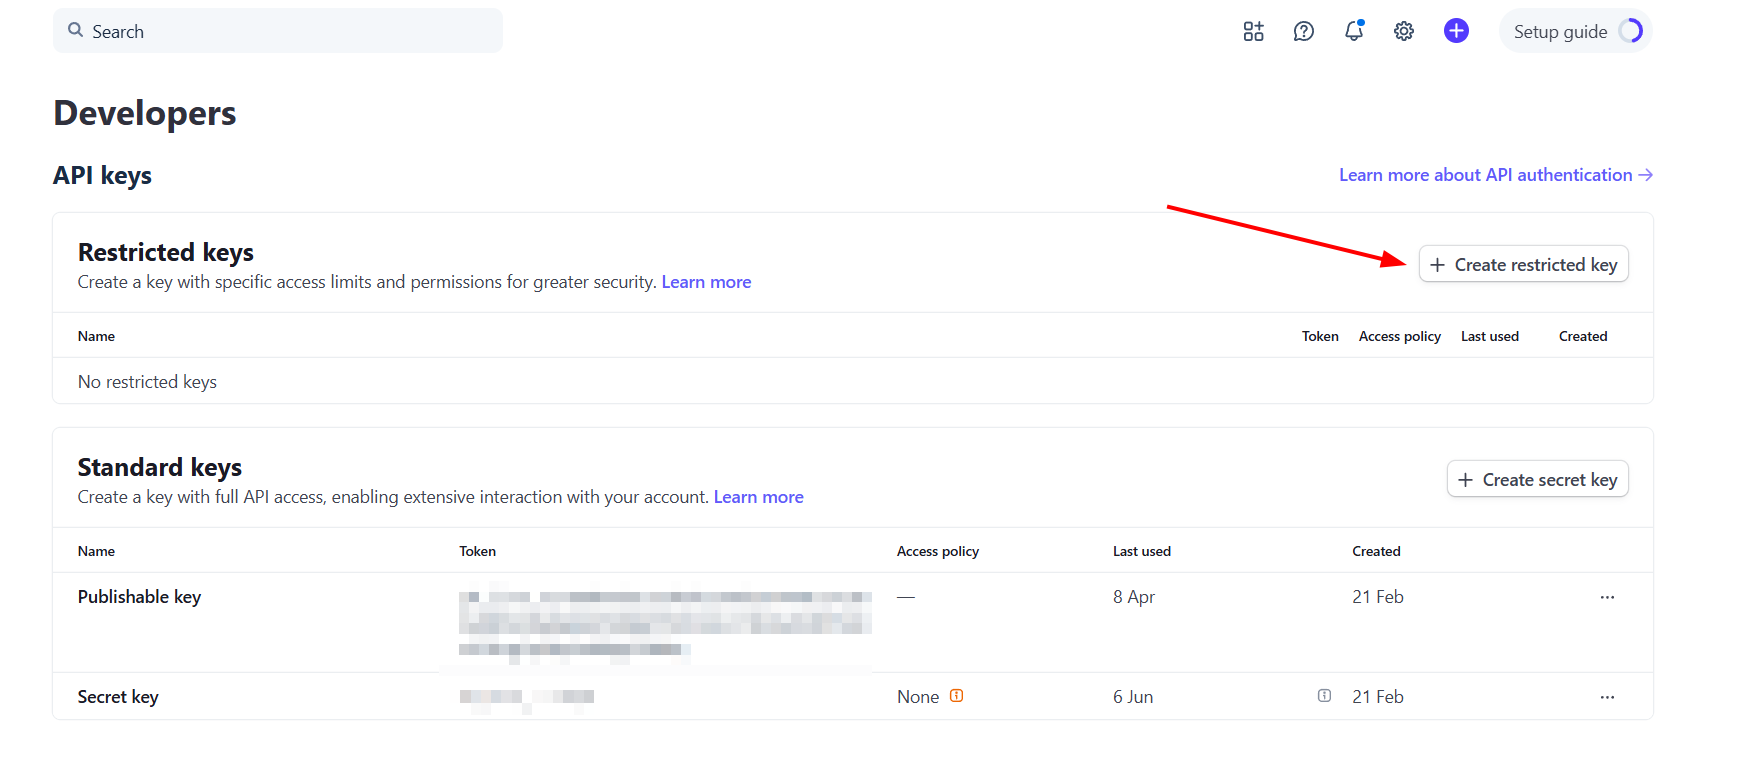
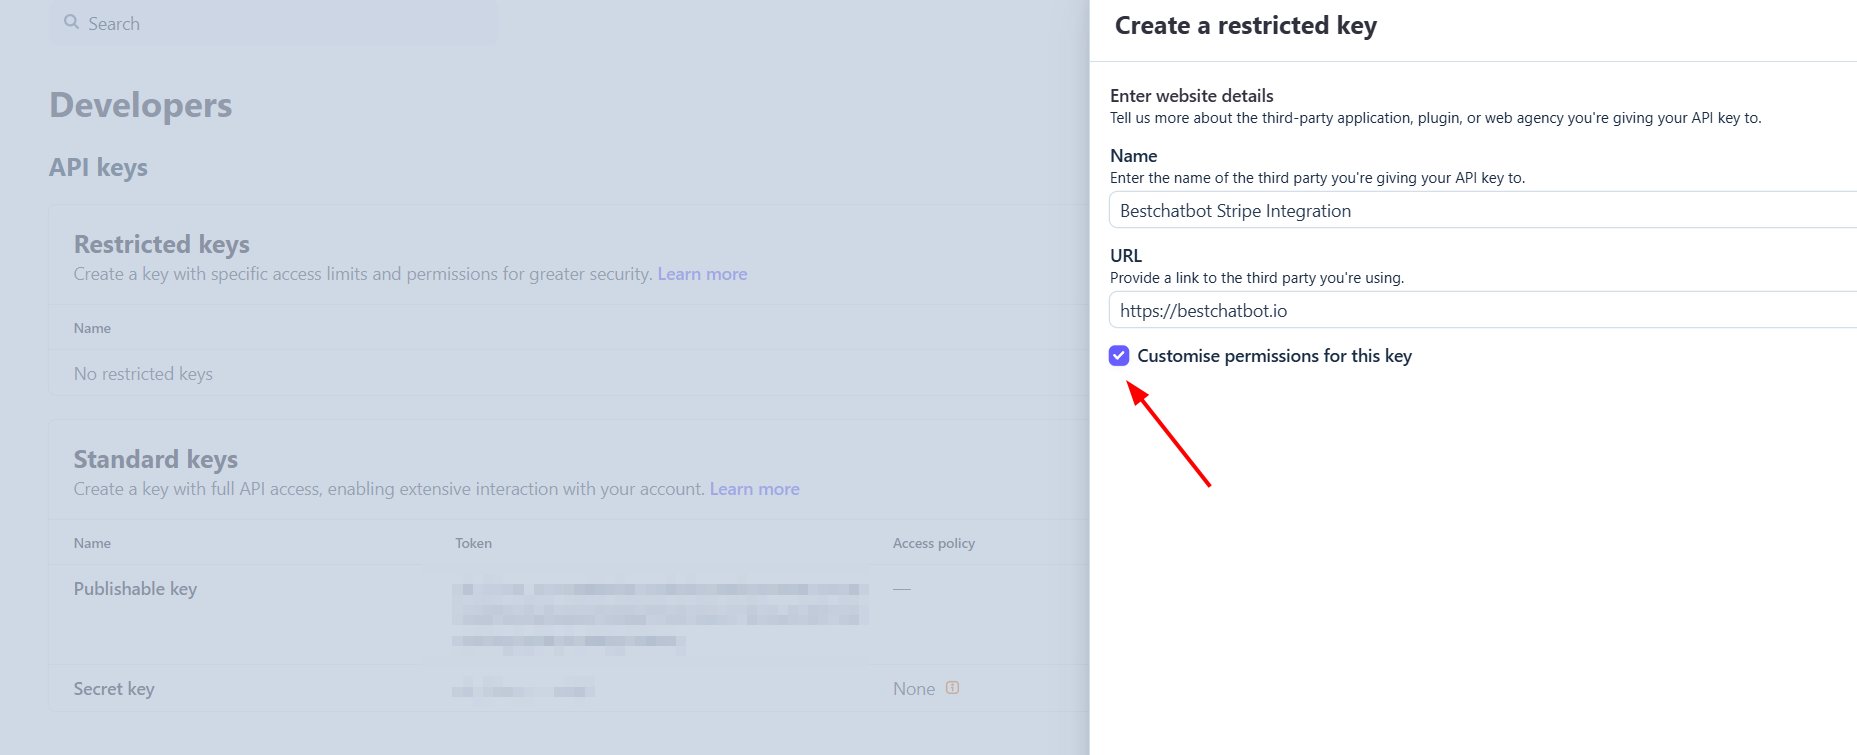
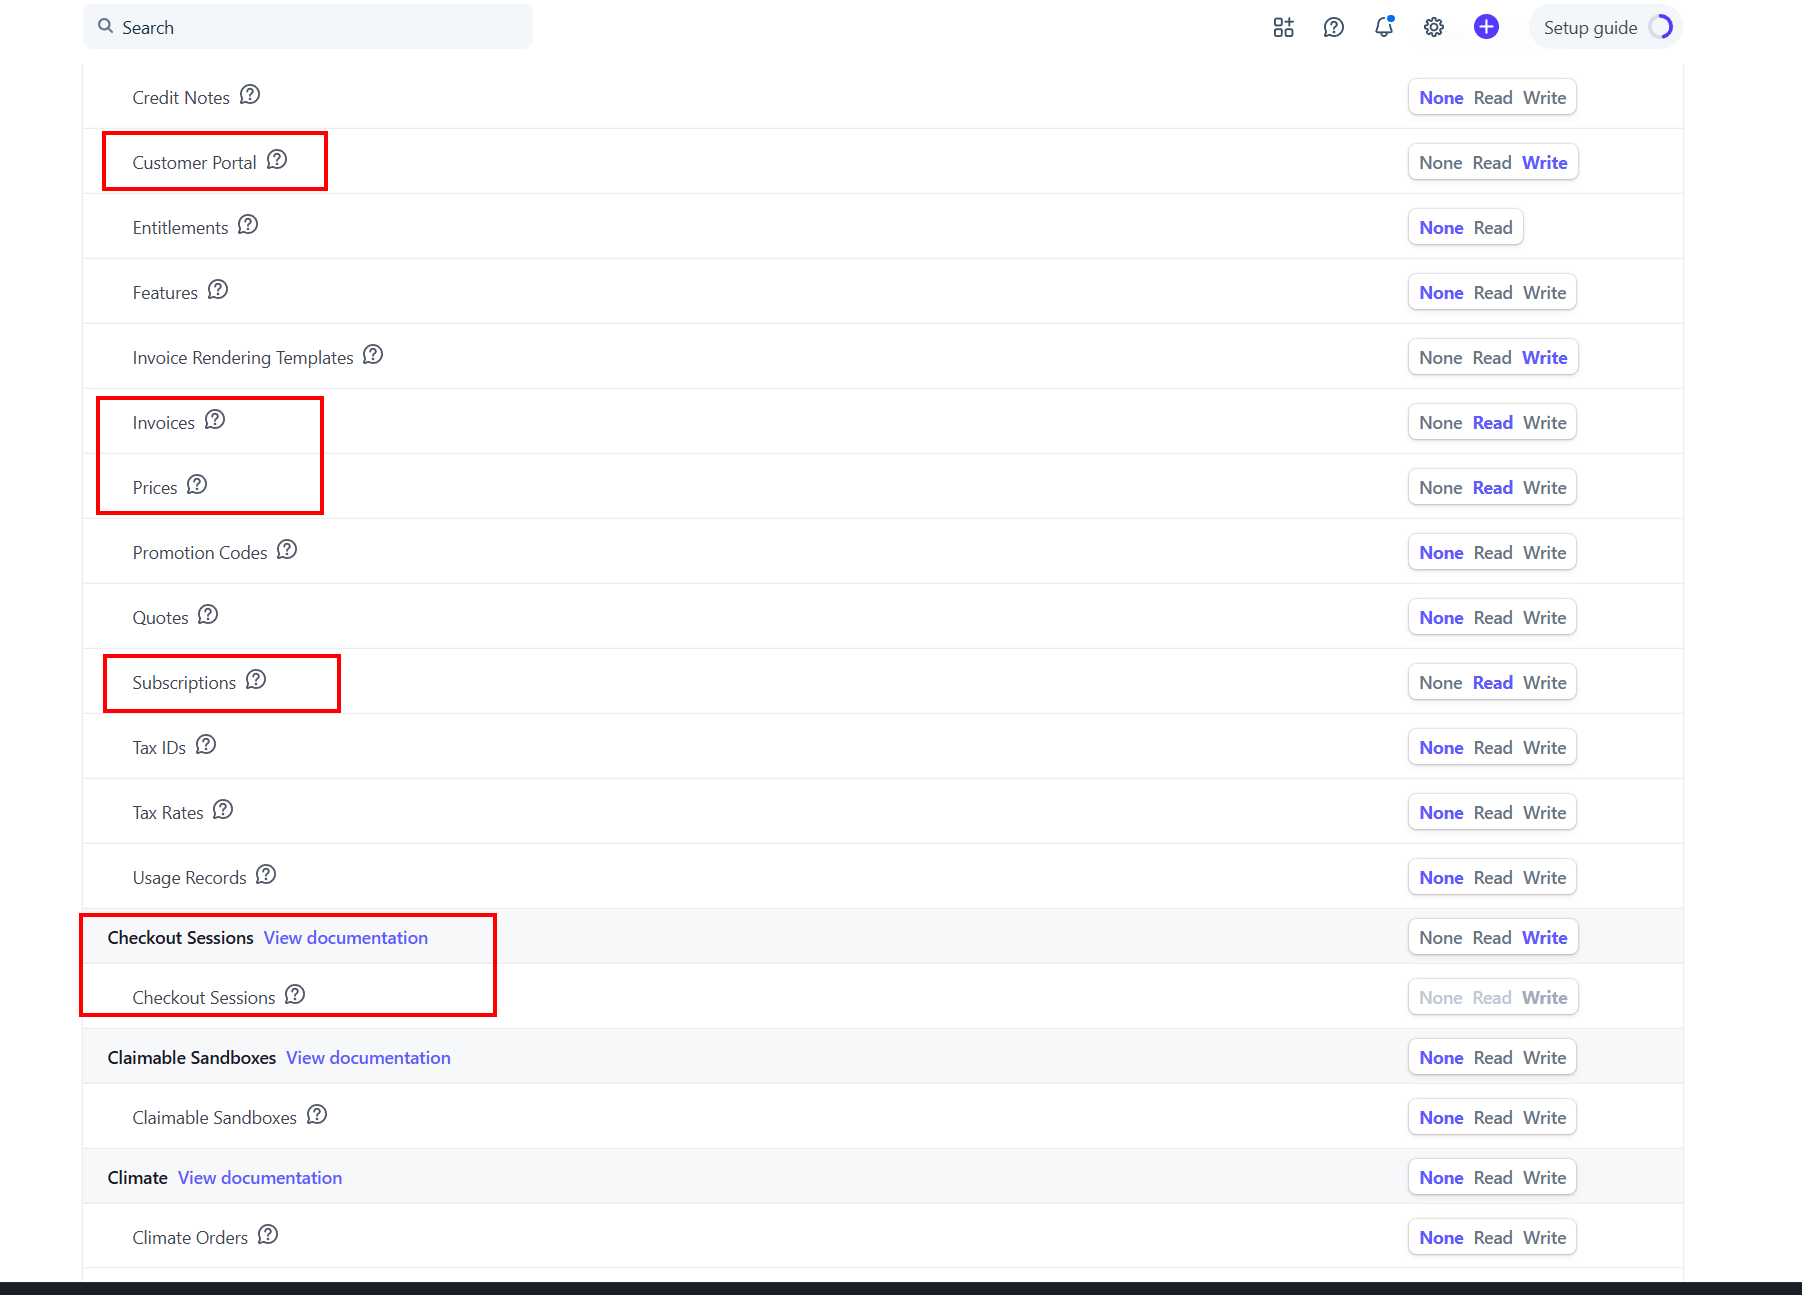
Step 2 — Grant the right permissions
Set exactly these permissions, and leave everything else as None:| Stripe resource | Permission |
|---|---|
| Customer Portal | Write |
| Invoices | Read |
| Prices | Read |
| Subscriptions | Read |
| Checkout Sessions | Write |
rk_live_....
Step 3 — Connect in BestChatBot
In your workspace dashboard, open the Integrations tab, find Stripe, and click Connect. A secure popup opens:- Paste your Restricted API Key into the key field.
- Leave Stripe Context empty — you don’t need it.
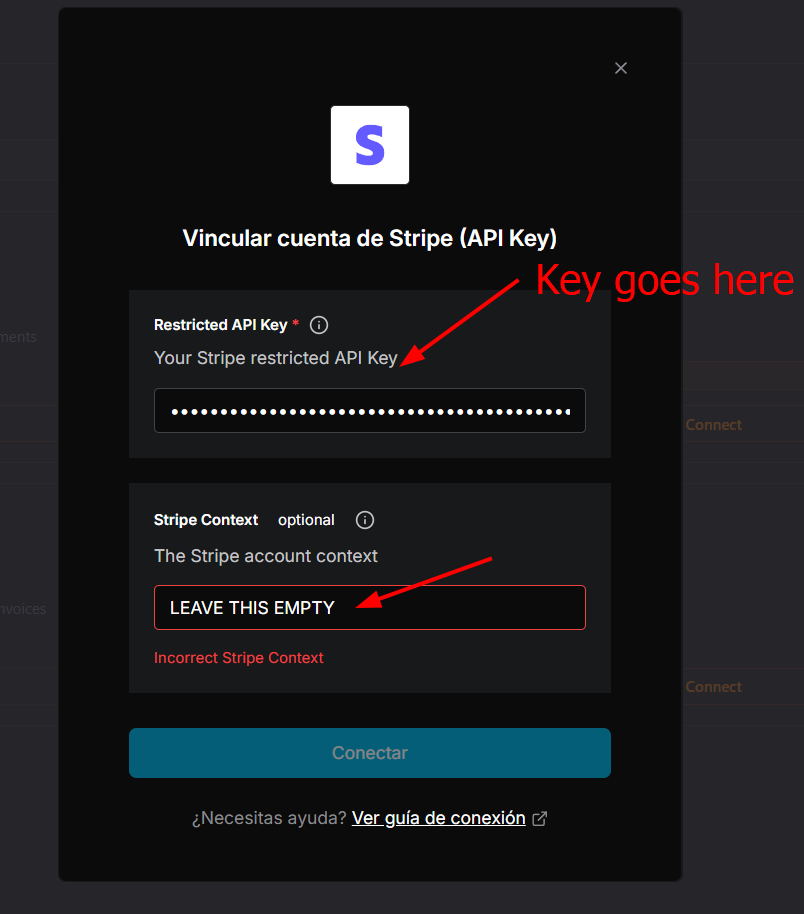
Connecting integrations requires an Editor, Admin, or Owner role. See Members & Roles.
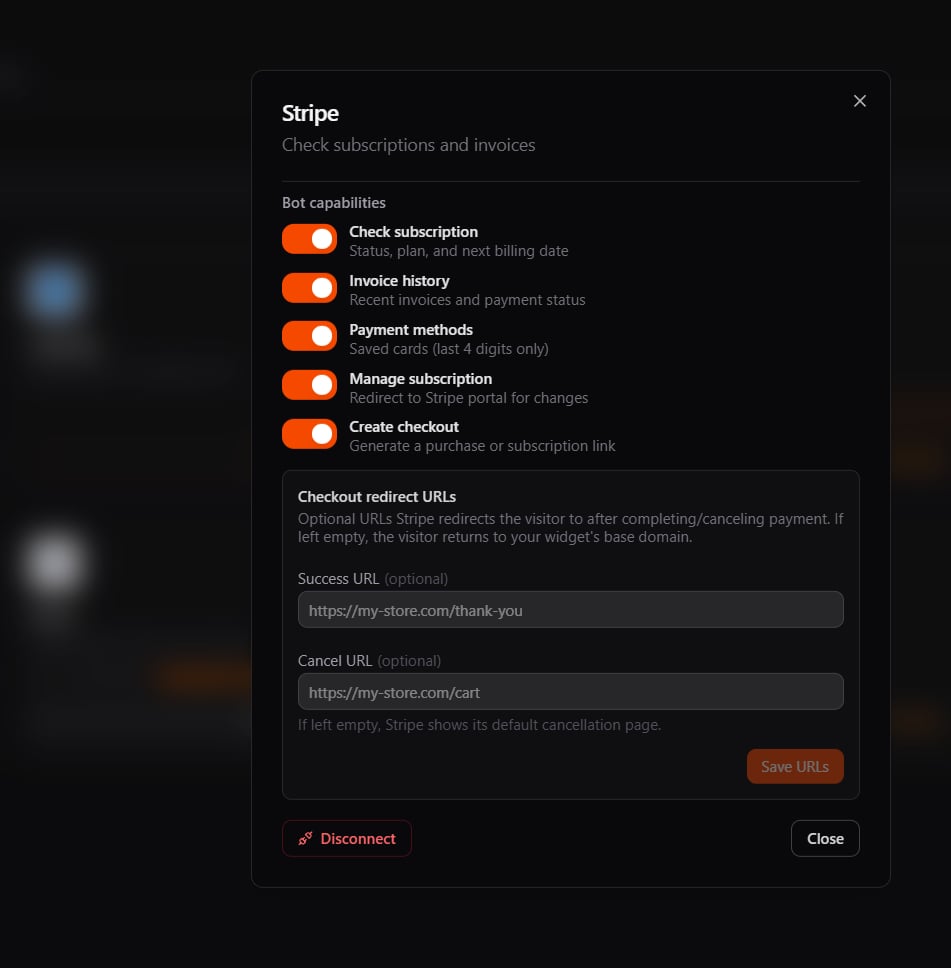
Step 4 — You’re connected
Once connected, Stripe’s actions become available to your widget right away. From the integration panel you can toggle each bot capability (check subscription, invoice history, payment methods, manage subscription, create checkout) and set optional Checkout redirect URLs:- Success URL — where the visitor lands after a completed payment.
- Cancel URL — where the visitor lands if they cancel.
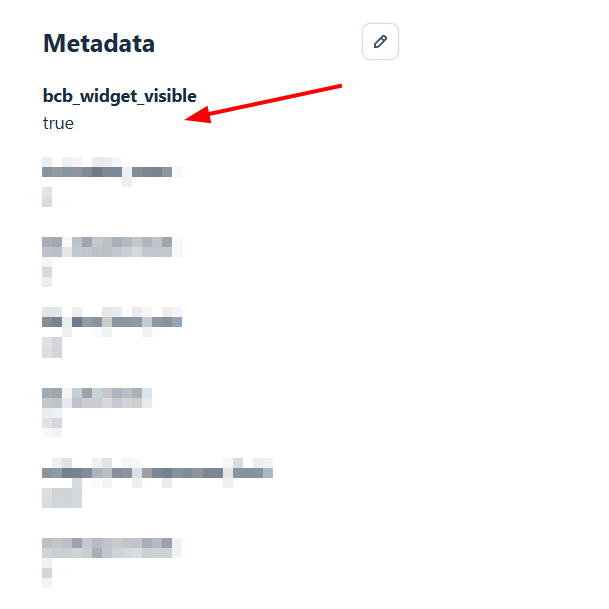
Showing Products in Checkout
When the bot offers Start a purchase, it only shows the products you’ve explicitly opted in — your full Stripe catalog is never exposed. To make a product available, add the metadata keybcb_widget_visible with the value true to the product (or to a specific price) in Stripe.
See It in Action
Once connected, identified visitors can check invoices, view saved payment methods, manage their subscription, and start a purchase — all from the widget.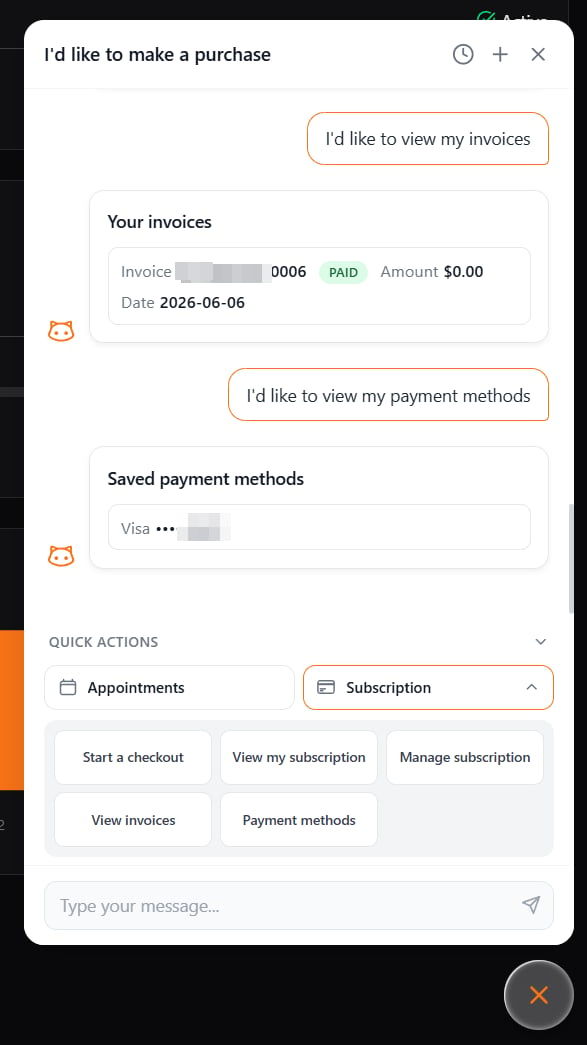
One per Category
Stripe is the only option in the Payments category, so it never conflicts with another integration.Availability
| Plan | Stripe |
|---|---|
| Free | — |
| Starter | — |
| Pro | ✅ |
| Business | ✅ |
Next Steps
All Integrations
See the full catalog and how categories work.
Agentic Actions
Learn how the bot turns a request into a real action.