> ## Documentation Index
> Fetch the complete documentation index at: https://docs.bestchatbot.io/llms.txt
> Use this file to discover all available pages before exploring further.

# Deploy Your Widget

> Configure the chat widget and embed it on your website.

# Deploy Your AI Chat Widget

After creating your workspace, configure the widget and paste a single script tag on your website. The widget appears as a floating chat bubble in the bottom-right corner of every page where the snippet is loaded.

## Configure Your Widget

<Steps>
  <Step title="Open the Configuration Tab">
    Your workspace already includes a web widget. From your workspace, open the **Web Widget** settings and go to the **Configuration** tab.
  </Step>

  <Step title="Style Your Widget">
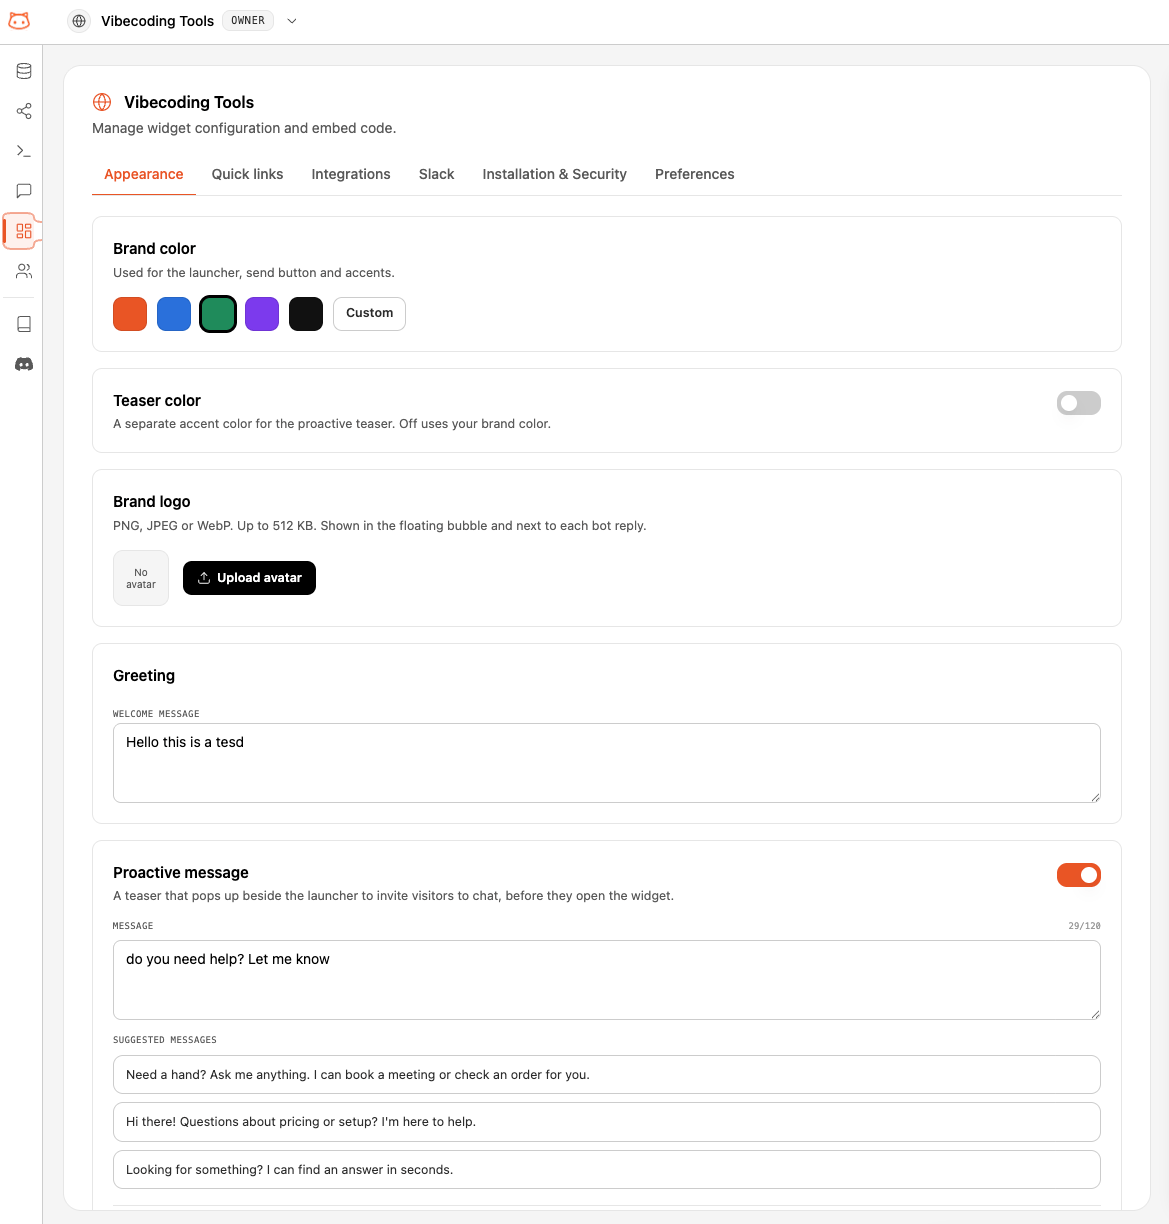
    Set the widget's appearance and where it can run:

    * **Primary Color**: your brand color in hex (e.g., `#F97316`)
    * **Position**: which corner the chat bubble sits in
    * **Bot Avatar**: an optional image shown in the bubble and next to each reply
    * **Allowed Origins**: the domains where the widget may run, one per line. Supports wildcards (`*.example.com`). Leave empty to allow all.

    Click **Save Changes**.
    <Frame>
      <img src="https://mintcdn.com/bestchatbot/97kdRjnWT0Lew0EI/images/widget-configuration-tab.png?fit=max&auto=format&n=97kdRjnWT0Lew0EI&q=85&s=782574029dc26262fd5239d116caf427" alt="Web Widget Configuration tab with Primary Color, Position, Bot Avatar, and Allowed Origins" width="1169" height="1224" data-path="images/widget-configuration-tab.png" />
    </Frame>
  </Step>

  <Step title="Copy the Embed Code">
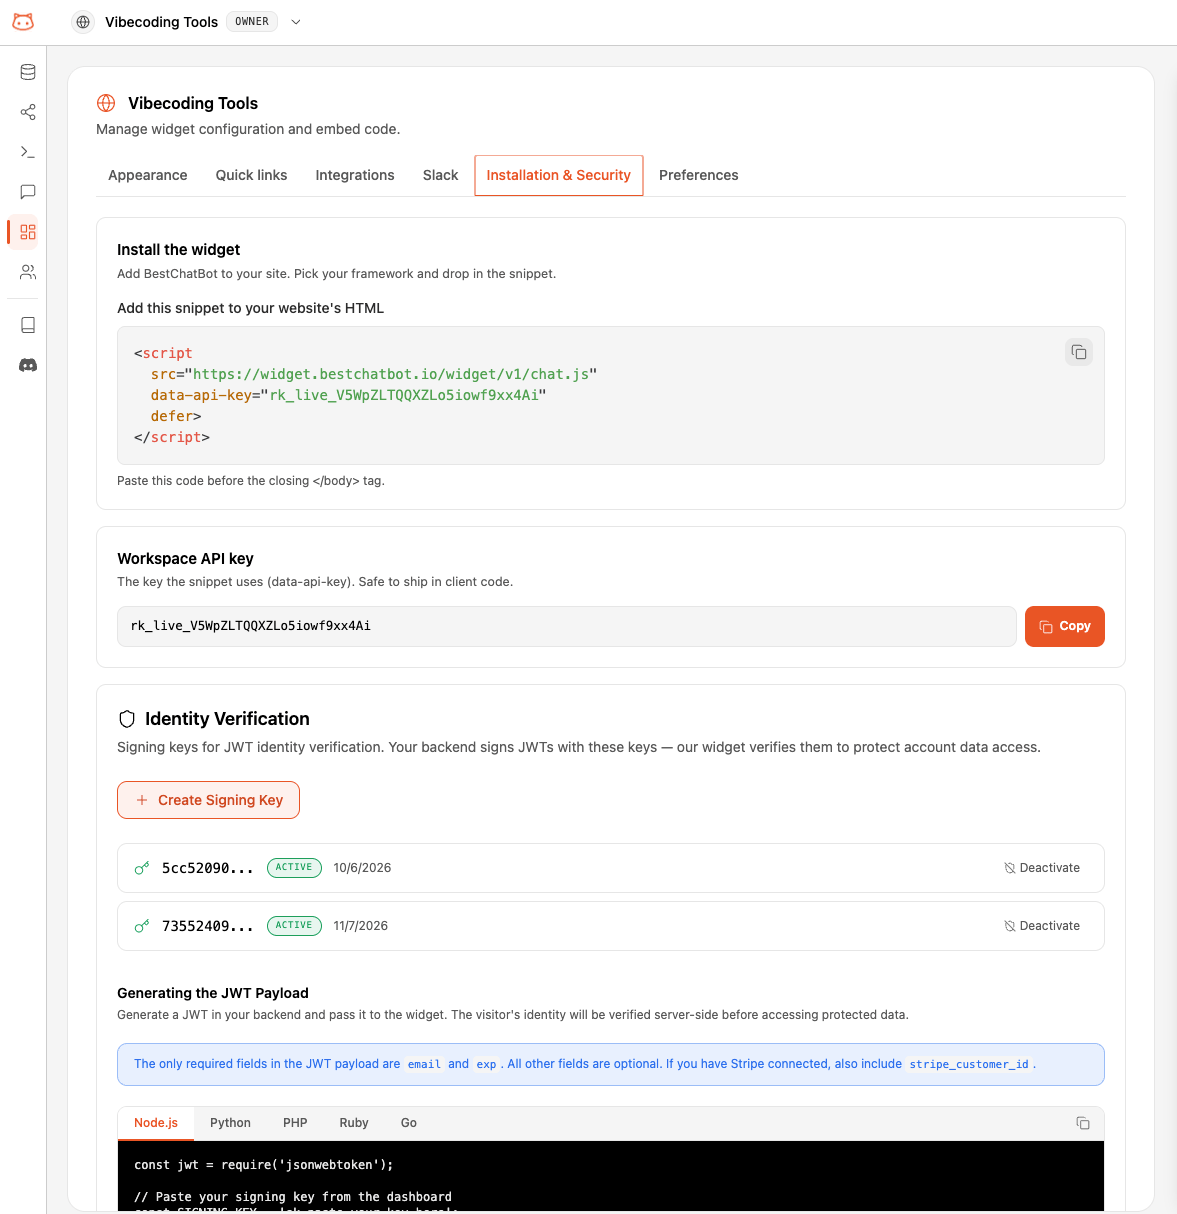
    After creation, open the **Installation** tab on your widget settings. You'll see a single script tag like this:

    ```html theme={null}
    <script
      src="https://widget.bestchatbot.io/widget/v1/chat.js"
      data-api-key="rk_live_xxxxxxxxxxxxxxxxxxxx"
      defer
    ></script>
    ```

    <Frame>
      <img src="https://mintcdn.com/bestchatbot/97kdRjnWT0Lew0EI/images/widget-embed-code.png?fit=max&auto=format&n=97kdRjnWT0Lew0EI&q=85&s=b128684febdd3a80643d4193072aae6d" alt="Installation tab showing the embed code with a copy button" width="1177" height="1214" data-path="images/widget-embed-code.png" />
    </Frame>
  </Step>

  <Step title="Paste on Your Website">
    Add the script tag just before the closing `</body>` tag on any page where the widget should appear.

    ```html theme={null}
    <body>
      <!-- Your website content -->

      <script
        src="https://widget.bestchatbot.io/widget/v1/chat.js"
        data-api-key="rk_live_xxxxxxxxxxxxxxxxxxxx"
        defer
      ></script>
    </body>
    ```
  </Step>

  <Step title="Verify It Works">
    Open your website in a browser. You should see a chat bubble in the bottom-right corner. Click it to open the chat window and test a question.

    <Frame>
      <img src="https://mintcdn.com/bestchatbot/f1dLrYEbIflhrKGl/images/widget-chat-open.png?fit=max&auto=format&n=f1dLrYEbIflhrKGl&q=85&s=e063b8cd604be75b95392e920985cb34" alt="Chat widget open on a website" width="515" height="804" data-path="images/widget-chat-open.png" />
    </Frame>
  </Step>
</Steps>

## Multiple Widgets

Each workspace runs one widget. To manage multiple sites or brands, create one workspace per widget. Each workspace has its own knowledge base, configuration, and usage tracking.

<Tip>Switch between workspaces using the workspace selector at the top of the dashboard.</Tip>

## Next Step

<Card title="Web Widget Guide" icon="window-maximize" href="/integrations/web-widget">
  Full guide: customize colors, allowed origins, programmatic API, troubleshooting, and more.
</Card>