> ## Documentation Index
> Fetch the complete documentation index at: https://docs.bestchatbot.io/llms.txt
> Use this file to discover all available pages before exploring further.
# WooCommerce
> What the WooCommerce integration can and can't do, and how to connect it step by step.
# WooCommerce
**Category: E-commerce.** Connect WooCommerce and your widget can find products and check orders for visitors, right inside the chat.
Integrations are available on the **Pro** and **Business** plans. WooCommerce shares the E-commerce category with Shopify, so only one of the two can be active at a time.
## What This Bot Can Do
The bot does exactly these actions, nothing more. "Needs sign-in" means the visitor must be identified first; otherwise the bot gives a safe, neutral answer.
| Action | What it does | Needs sign-in |
| -------------------------------- | ------------------------------------------------------------------------------------------------- | :-----------: |
| **Search products** | Search your catalog by keyword and show products with price and image (up to 100). | No |
| **Check order status** | Look up an order's status and details by the visitor's email. | Yes |
| **Update their profile** | Let a signed-in customer update their own name, phone, or email — they confirm before it's saved. | Yes |
| **Update their billing address** | Let a signed-in customer update their own billing address — they confirm first. | Yes |
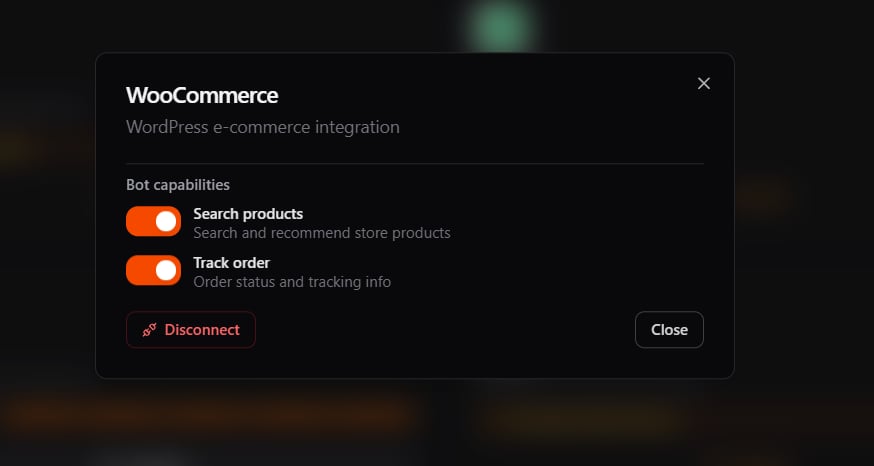
The two update actions are optional. You can turn each one off from the WooCommerce panel if you'd rather keep the bot read-only.
## What It Can't Do
WooCommerce is scoped to the actions above. It does **not**:
* Add items to a cart or check out from the chat (visitors do that on your store)
* Process returns or change an order from the chat
* Look up an order without the visitor's email
## Part 1 — Connect WooCommerce
BestChatBot connects to WooCommerce automatically. You enter your store address and the connection is authorized for you — the official BestChatBot WordPress plugin handles it, handing BestChatBot a secure, encrypted key. There's nothing to generate, paste, or approve.
Connecting integrations requires an **Editor**, **Admin**, or **Owner** role. See [Members & Roles](/workspace/members-roles).
In your workspace dashboard, open the **Integrations** tab, find **WooCommerce**, and click **Connect**.
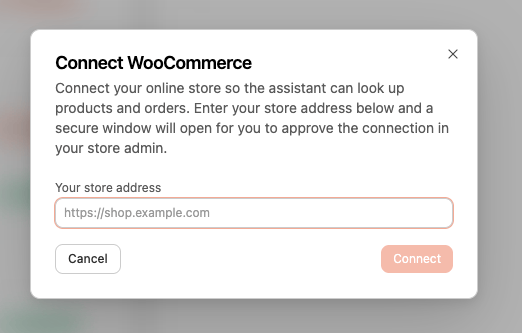
In the dialog, enter your store's address (for example `https://shop.example.com`) and click **Connect**. The connection is authorized automatically — there's nothing to approve.
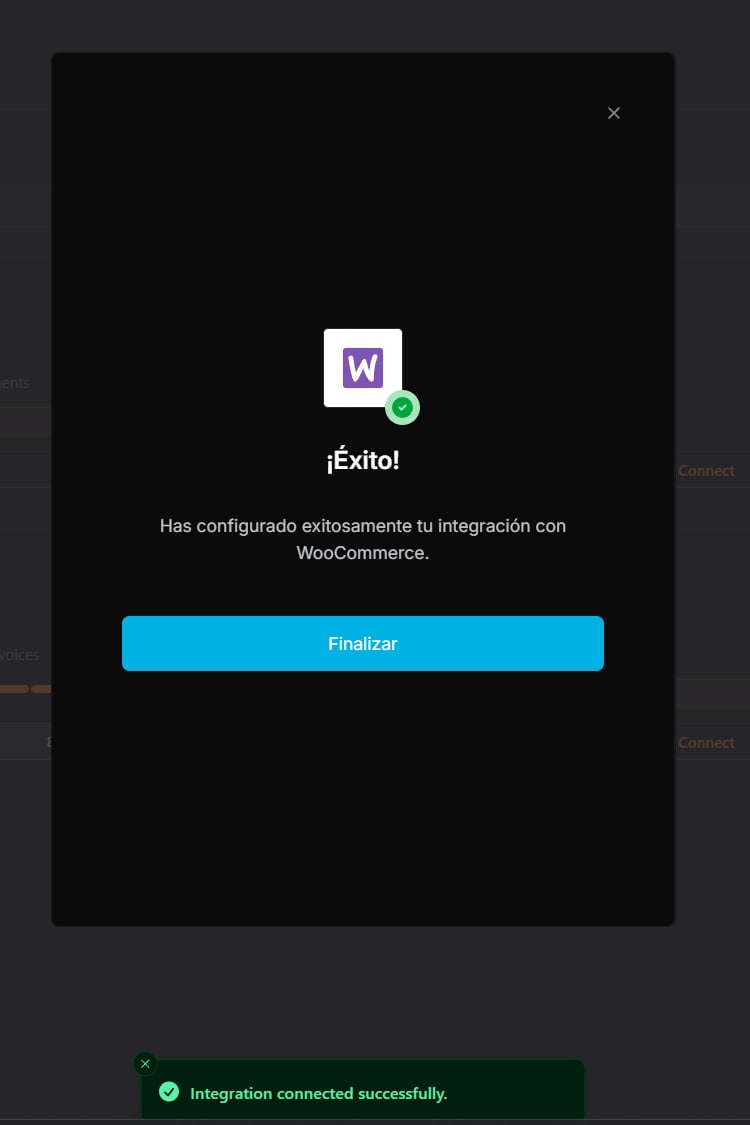
 The window closes and WooCommerce shows as connected — its actions become available right away. If Shopify was connected, it's disconnected automatically.
 From the integration panel you can toggle each **bot capability**.
 ## Part 2 — Install the Widget on WordPress
Connecting WooCommerce lets the bot read your store. To **show the widget on your site** and let logged-in customers check **their own** orders without typing their email, install the official **Chatbot IO Widget** WordPress plugin. It embeds the widget and signs a short identity token for the logged-in customer, so order lookups are identity-aware out of the box.
### Step 1 — Install the plugin
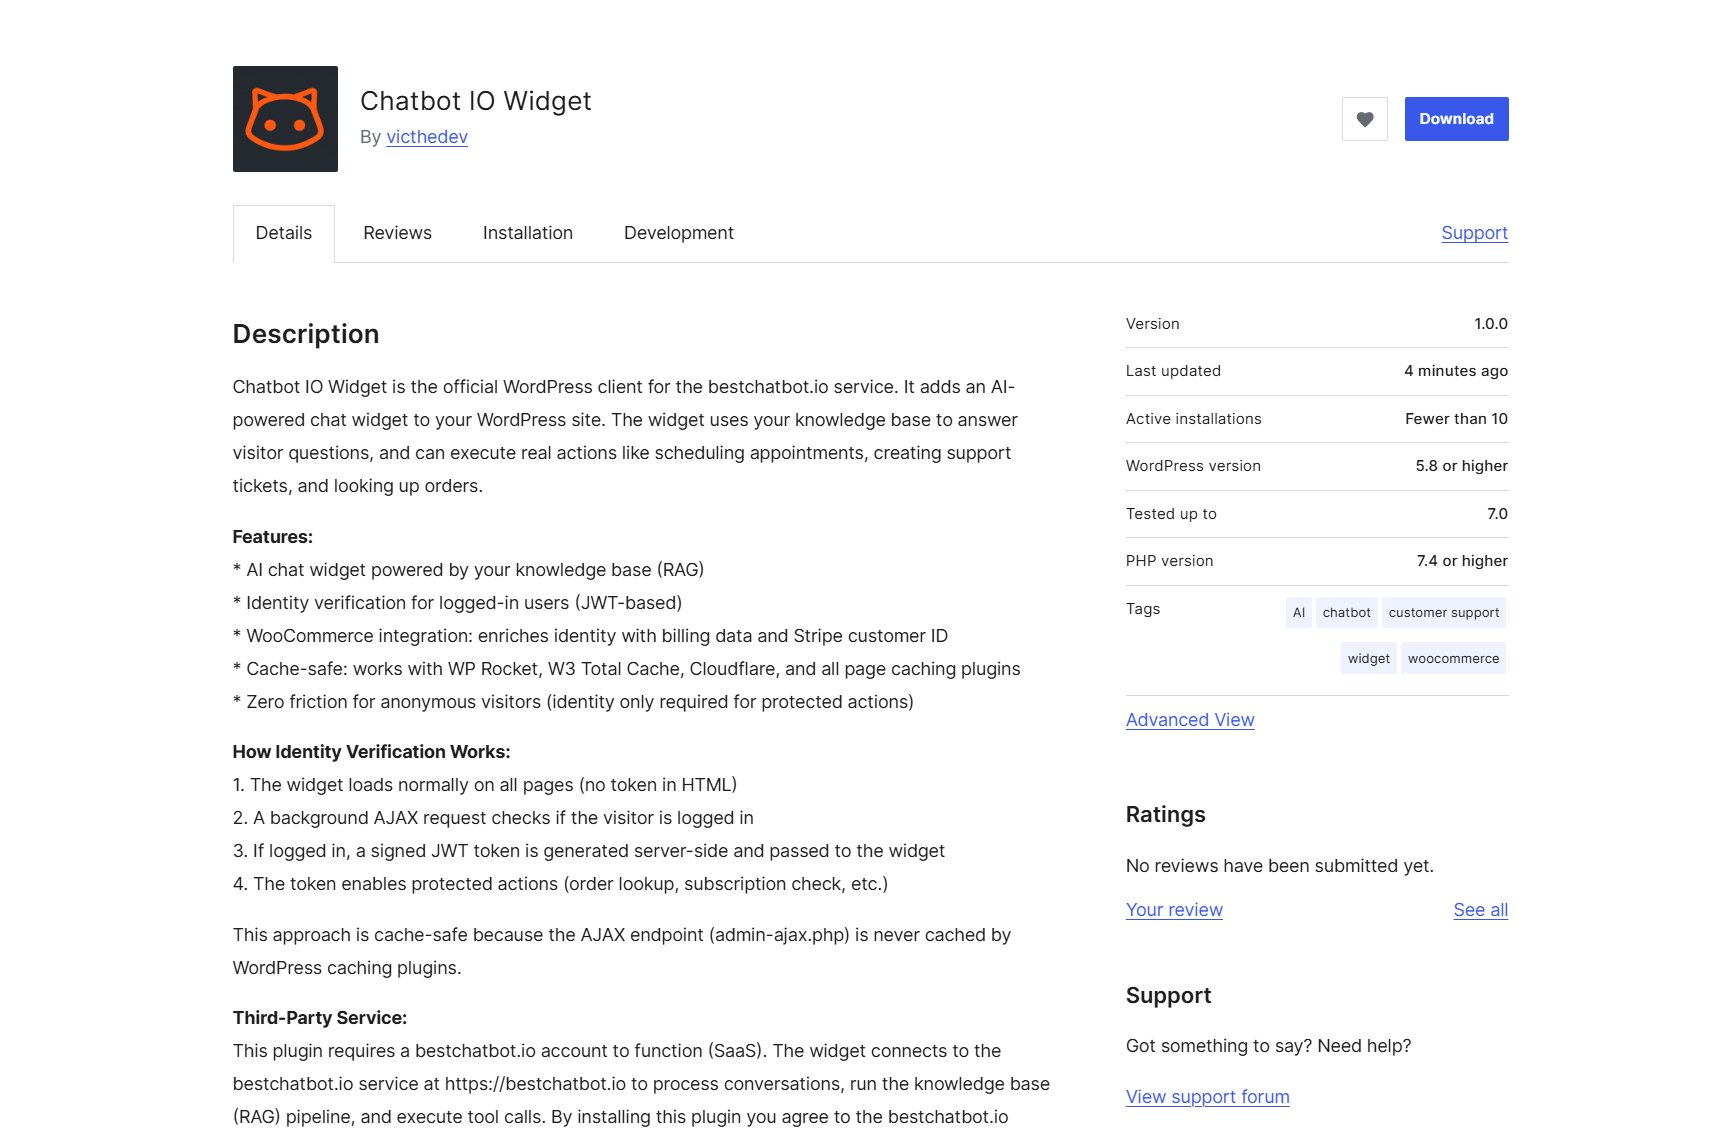
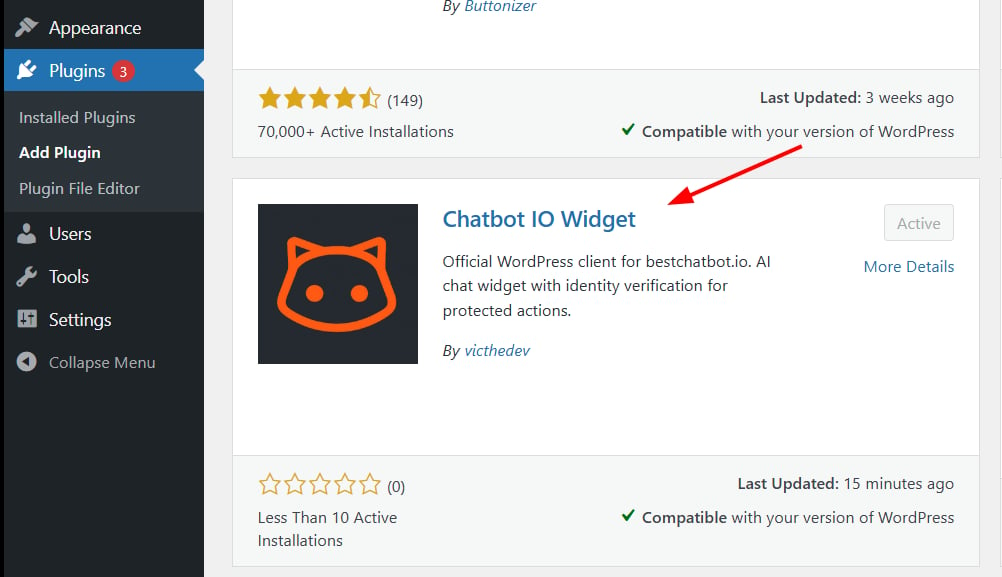
In WordPress, go to **Plugins → Add Plugin** and search for **Chatbot IO Widget** (by victhedev). Install and activate it.
## Part 2 — Install the Widget on WordPress
Connecting WooCommerce lets the bot read your store. To **show the widget on your site** and let logged-in customers check **their own** orders without typing their email, install the official **Chatbot IO Widget** WordPress plugin. It embeds the widget and signs a short identity token for the logged-in customer, so order lookups are identity-aware out of the box.
### Step 1 — Install the plugin
In WordPress, go to **Plugins → Add Plugin** and search for **Chatbot IO Widget** (by victhedev). Install and activate it.
 ### Step 2 — Create a signing key in BestChatBot
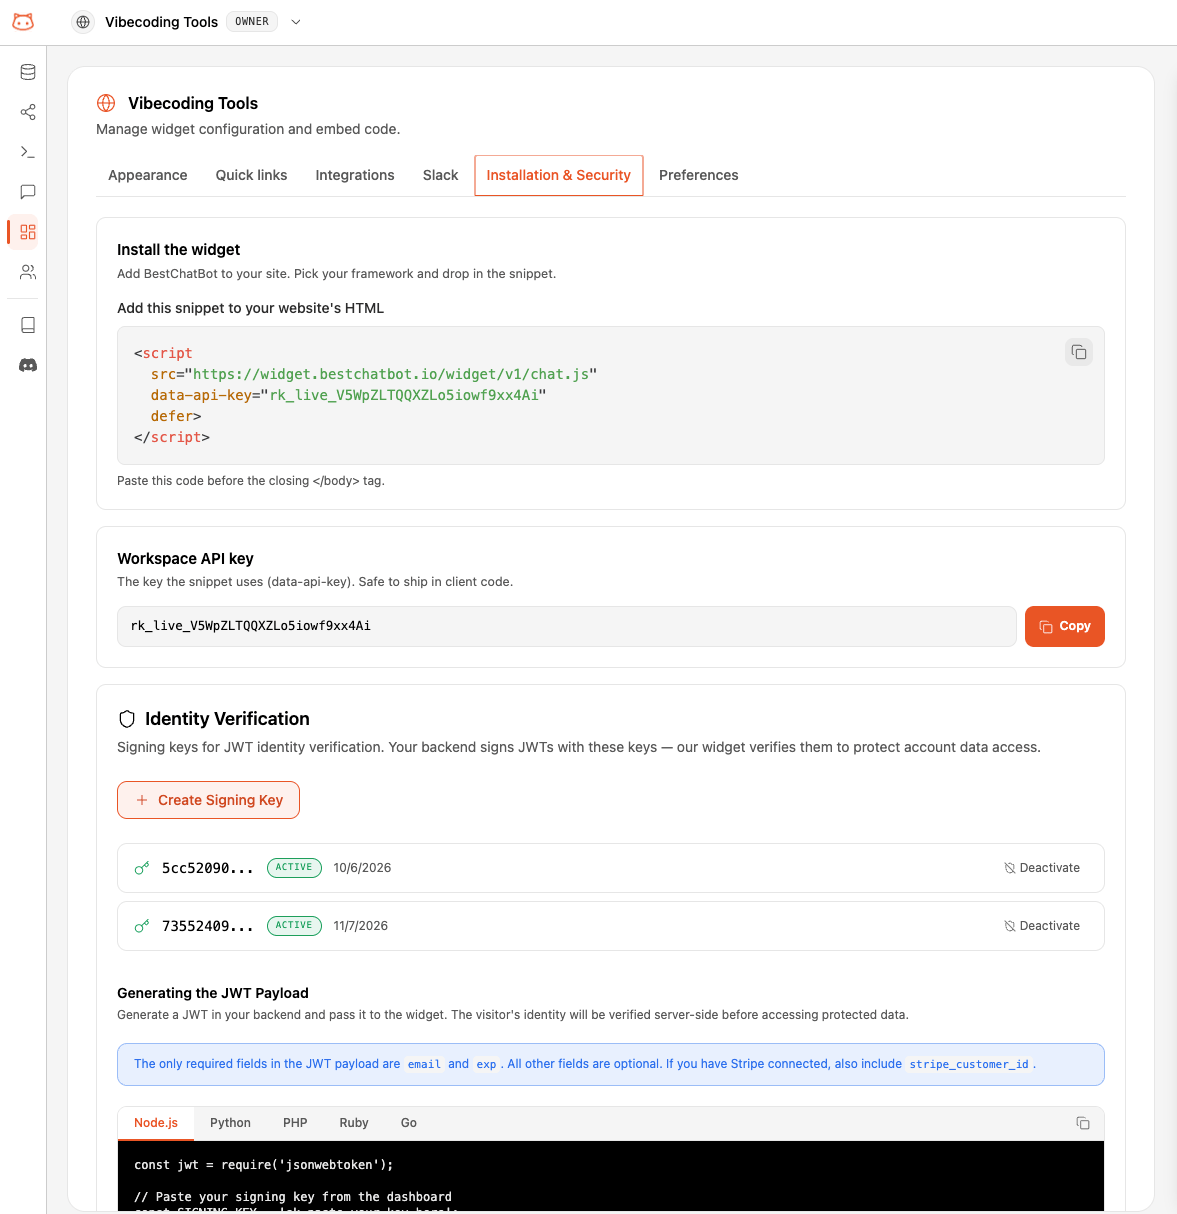
In your dashboard, open your **Web Widget → Security** tab and click **Create Signing Key**. This key lets your site sign identity tokens that the widget trusts. Keep it secret.
### Step 2 — Create a signing key in BestChatBot
In your dashboard, open your **Web Widget → Security** tab and click **Create Signing Key**. This key lets your site sign identity tokens that the widget trusts. Keep it secret.
 For the full identity flow and token format, see [Visitor Identity](/integrations/identity/overview).
### Step 3 — Configure the plugin
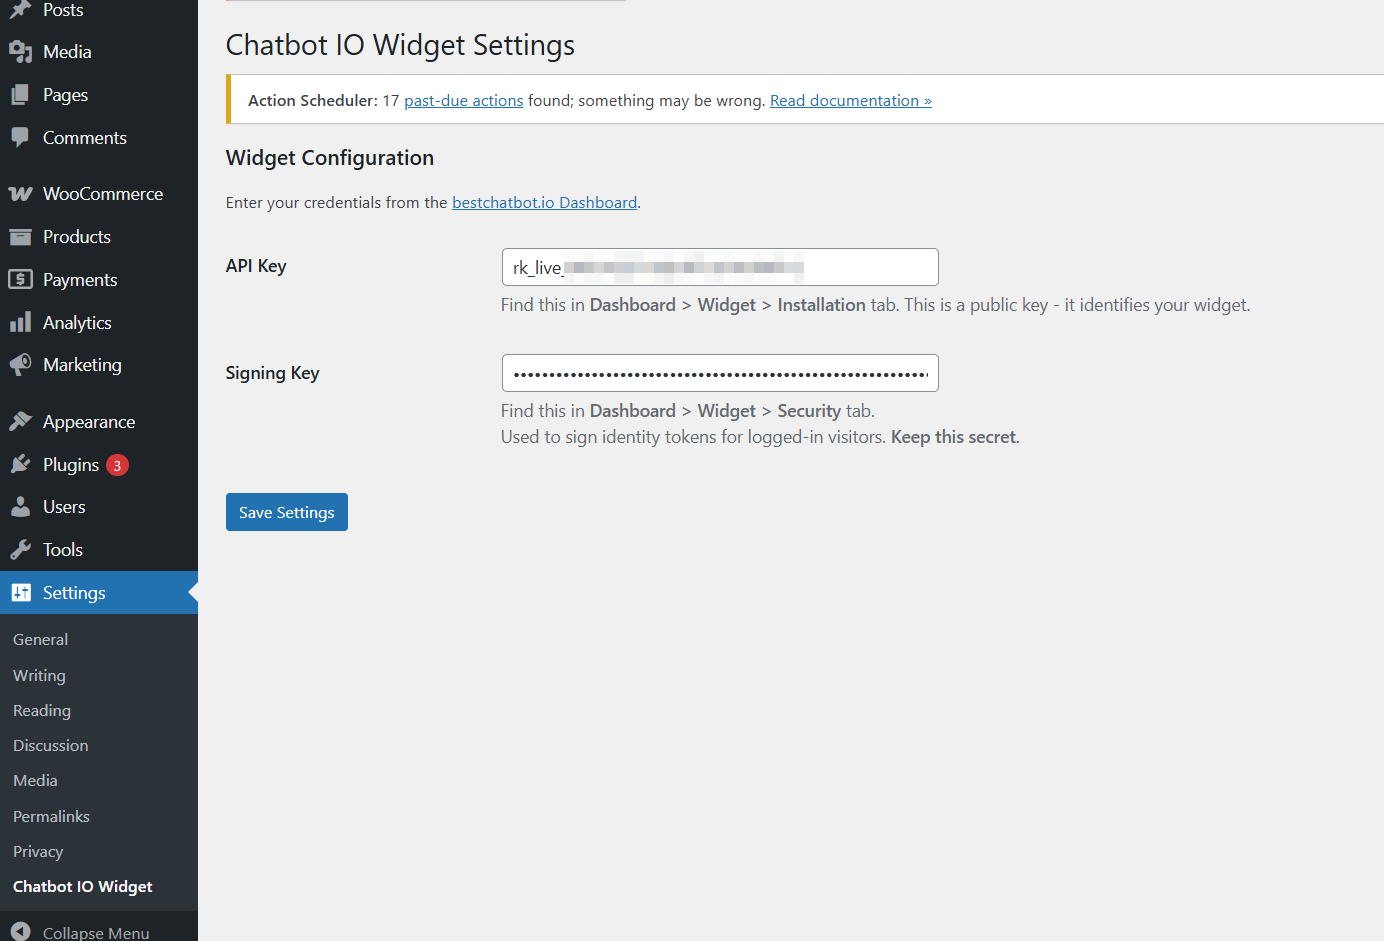
Open **Settings → Chatbot IO Widget** in WordPress and enter:
* **API Key** — your widget's public key (`rk_live_...`), found in **Dashboard → Web Widget → Installation**.
* **Signing Key** — the secret key from **Dashboard → Web Widget → Security** (Step 2). Keep it secret.
Save the settings.
For the full identity flow and token format, see [Visitor Identity](/integrations/identity/overview).
### Step 3 — Configure the plugin
Open **Settings → Chatbot IO Widget** in WordPress and enter:
* **API Key** — your widget's public key (`rk_live_...`), found in **Dashboard → Web Widget → Installation**.
* **Signing Key** — the secret key from **Dashboard → Web Widget → Security** (Step 2). Keep it secret.
Save the settings.
 ### Done — identity-aware order lookups
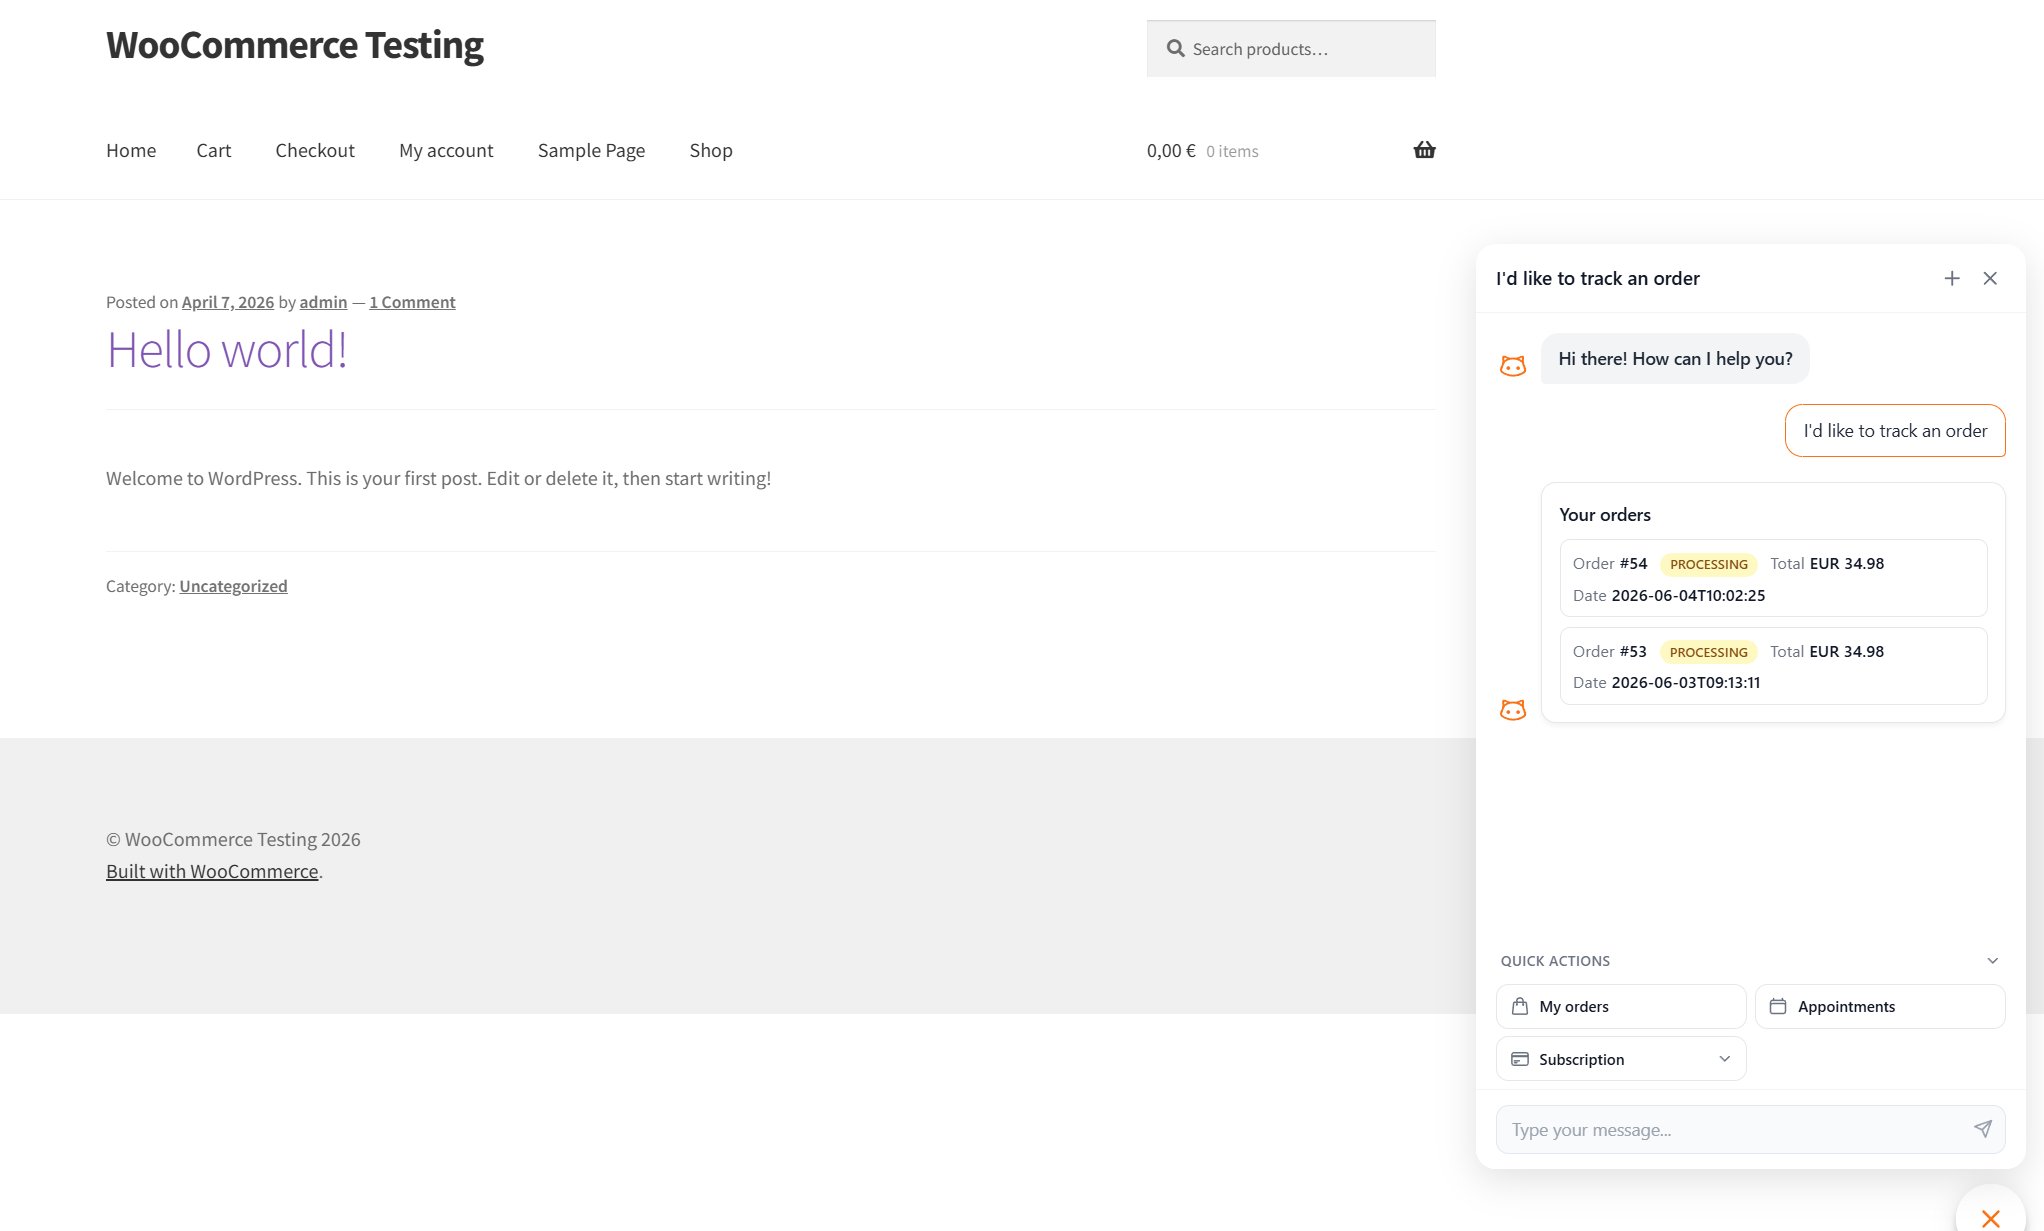
The widget now appears on your store, and logged-in customers can ask things like "track my order" and get **their** orders back instantly, with no email prompt.
### Done — identity-aware order lookups
The widget now appears on your store, and logged-in customers can ask things like "track my order" and get **their** orders back instantly, with no email prompt.
 ## One per Category
WooCommerce is in the **E-commerce** category with Shopify. Connecting one disconnects the other, so your bot always has a single, clear tool for e-commerce.
If you connect WooCommerce while Shopify is active, Shopify is turned off automatically.
## Availability
| Plan | WooCommerce |
| -------- | ----------- |
| Free | — |
| Starter | — |
| Pro | ✅ |
| Business | ✅ |
## Next Steps
Set up identity verification for personal actions like order lookups.
Learn how the bot turns a request into a real action.
## One per Category
WooCommerce is in the **E-commerce** category with Shopify. Connecting one disconnects the other, so your bot always has a single, clear tool for e-commerce.
If you connect WooCommerce while Shopify is active, Shopify is turned off automatically.
## Availability
| Plan | WooCommerce |
| -------- | ----------- |
| Free | — |
| Starter | — |
| Pro | ✅ |
| Business | ✅ |
## Next Steps
Set up identity verification for personal actions like order lookups.
Learn how the bot turns a request into a real action.