> ## Documentation Index
> Fetch the complete documentation index at: https://docs.bestchatbot.io/llms.txt
> Use this file to discover all available pages before exploring further.
# Help Links
> Show quick links on your widget's home screen and let the bot answer from their content.
# Help Links
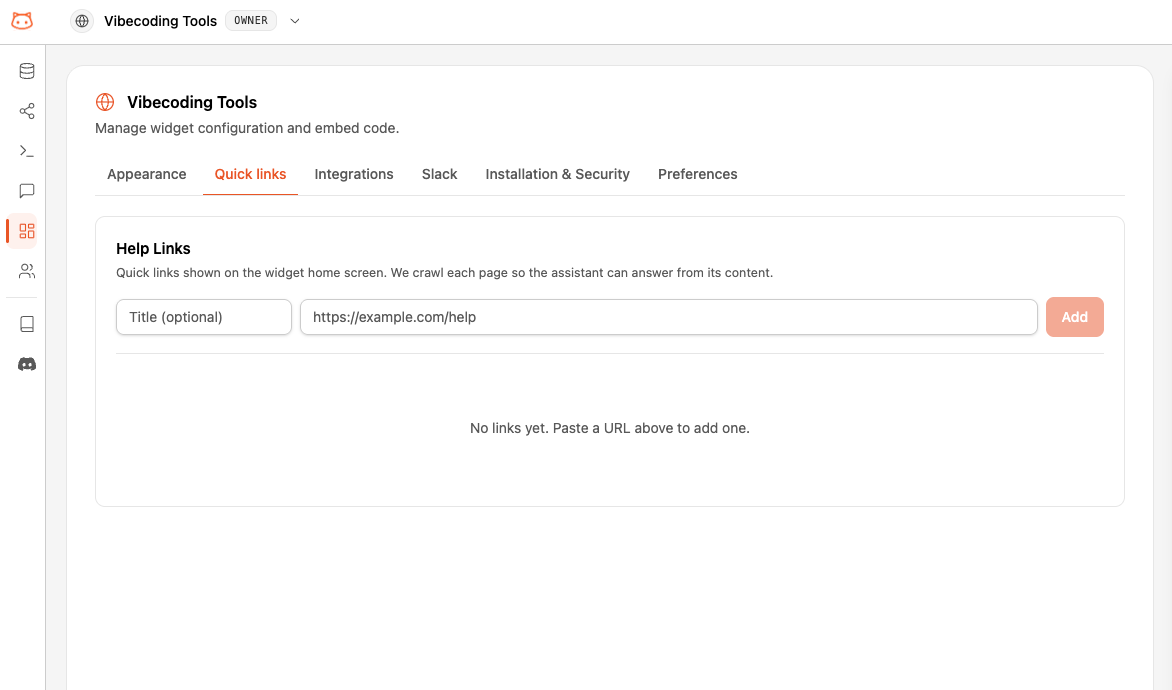
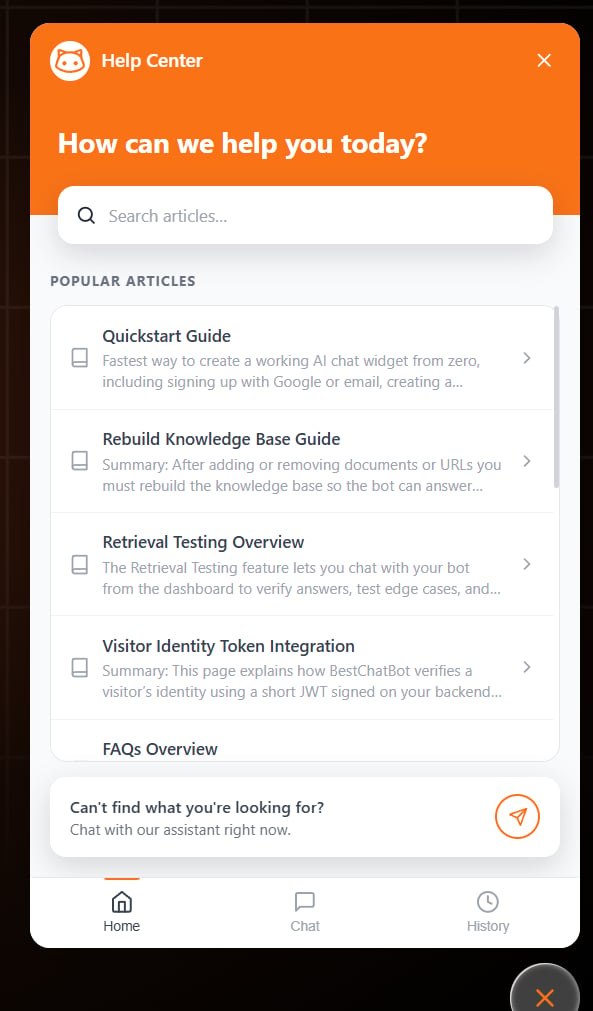
**Help Links** are quick links shown on your widget's home screen, under **Popular Articles**. They give visitors a fast way to reach your most important pages, and they make the bot smarter: BestChatBot **crawls each linked page** so the assistant can answer questions directly from that content.
 ## How It Works
When you add a Help Link, two things happen:
1. **It appears on the widget** as a clickable article on the home screen.
2. **The page is crawled** in the background. BestChatBot fetches the page, extracts a clean title and a searchable summary, and indexes it so the bot can use that content in its answers.
Help Links are indexed **separately** from your main Knowledge Base. They do **not** count toward your plan's scraped-pages limit or knowledge base size, and you don't need to rebuild the knowledge base after adding one.
## Adding a Help Link
From your workspace, open the **Web Widget** settings and select the **Help Links** tab.
Paste the page URL (for example, `https://yoursite.com/help`). Optionally add a **Title** to control how the link is labeled. If you leave the title empty, BestChatBot generates one from the page automatically.
The link is created and starts crawling immediately. You'll see its status change from **Processing** to **Ready** once the page has been indexed.
## Link Status
Each link shows a status badge:
| Status | Meaning |
| -------------- | ------------------------------------------------------------------------------------------------------------------- |
| **Processing** | The page is being crawled and indexed. |
| **Ready** | The page was indexed successfully. The bot can now answer from its content. |
| **Failed** | The page couldn't be crawled (for example, it's unreachable or blocks crawlers). Hover the badge to see the reason. |
## Managing Links
Each link in the list can be:
* **Reordered** — drag the handle on the left to change the order articles appear on the widget.
* **Refreshed** — click the refresh icon to re-crawl the page after its content changes. A short cooldown applies between refreshes.
* **Renamed** — click the pencil icon to edit the displayed title inline.
* **Deleted** — click the trash icon to remove the link.
There's a limit on how many links a workspace can have and how many refreshes you can run per day. If you hit it, remove links you no longer need or try again the next day.
## On the Widget
Visitors see your Help Links as **Popular Articles** on the widget's **Home** tab. They can search, open an article, or jump straight into a chat.
## How It Works
When you add a Help Link, two things happen:
1. **It appears on the widget** as a clickable article on the home screen.
2. **The page is crawled** in the background. BestChatBot fetches the page, extracts a clean title and a searchable summary, and indexes it so the bot can use that content in its answers.
Help Links are indexed **separately** from your main Knowledge Base. They do **not** count toward your plan's scraped-pages limit or knowledge base size, and you don't need to rebuild the knowledge base after adding one.
## Adding a Help Link
From your workspace, open the **Web Widget** settings and select the **Help Links** tab.
Paste the page URL (for example, `https://yoursite.com/help`). Optionally add a **Title** to control how the link is labeled. If you leave the title empty, BestChatBot generates one from the page automatically.
The link is created and starts crawling immediately. You'll see its status change from **Processing** to **Ready** once the page has been indexed.
## Link Status
Each link shows a status badge:
| Status | Meaning |
| -------------- | ------------------------------------------------------------------------------------------------------------------- |
| **Processing** | The page is being crawled and indexed. |
| **Ready** | The page was indexed successfully. The bot can now answer from its content. |
| **Failed** | The page couldn't be crawled (for example, it's unreachable or blocks crawlers). Hover the badge to see the reason. |
## Managing Links
Each link in the list can be:
* **Reordered** — drag the handle on the left to change the order articles appear on the widget.
* **Refreshed** — click the refresh icon to re-crawl the page after its content changes. A short cooldown applies between refreshes.
* **Renamed** — click the pencil icon to edit the displayed title inline.
* **Deleted** — click the trash icon to remove the link.
There's a limit on how many links a workspace can have and how many refreshes you can run per day. If you hit it, remove links you no longer need or try again the next day.
## On the Widget
Visitors see your Help Links as **Popular Articles** on the widget's **Home** tab. They can search, open an article, or jump straight into a chat.
 Add links to your most-visited support pages, pricing, and onboarding guides. Visitors get one-click access, and the bot can answer from those same pages when someone asks instead of clicking.
## Next Steps
Configure and install the chat widget on your site.
Scrape full sites or sections into your knowledge base.
Add links to your most-visited support pages, pricing, and onboarding guides. Visitors get one-click access, and the bot can answer from those same pages when someone asks instead of clicking.
## Next Steps
Configure and install the chat widget on your site.
Scrape full sites or sections into your knowledge base.